Connecting your Accounting Software with Coreloops
Coreloops makes it easy to process purchases, update your project cost reports, and sync with your accounting system all in one workflow. Now you no longer have to enter data twice into your accounting system and then again into your project cost reports.
Written By Gabriel Makinwa
Last updated About 6 hours ago
How to set up your Accounting Software
Coreloops allows you to connect to any of the following:
Xero
Quickbooks
Sage 50
Connecting to accounting software
To get the integration connected:
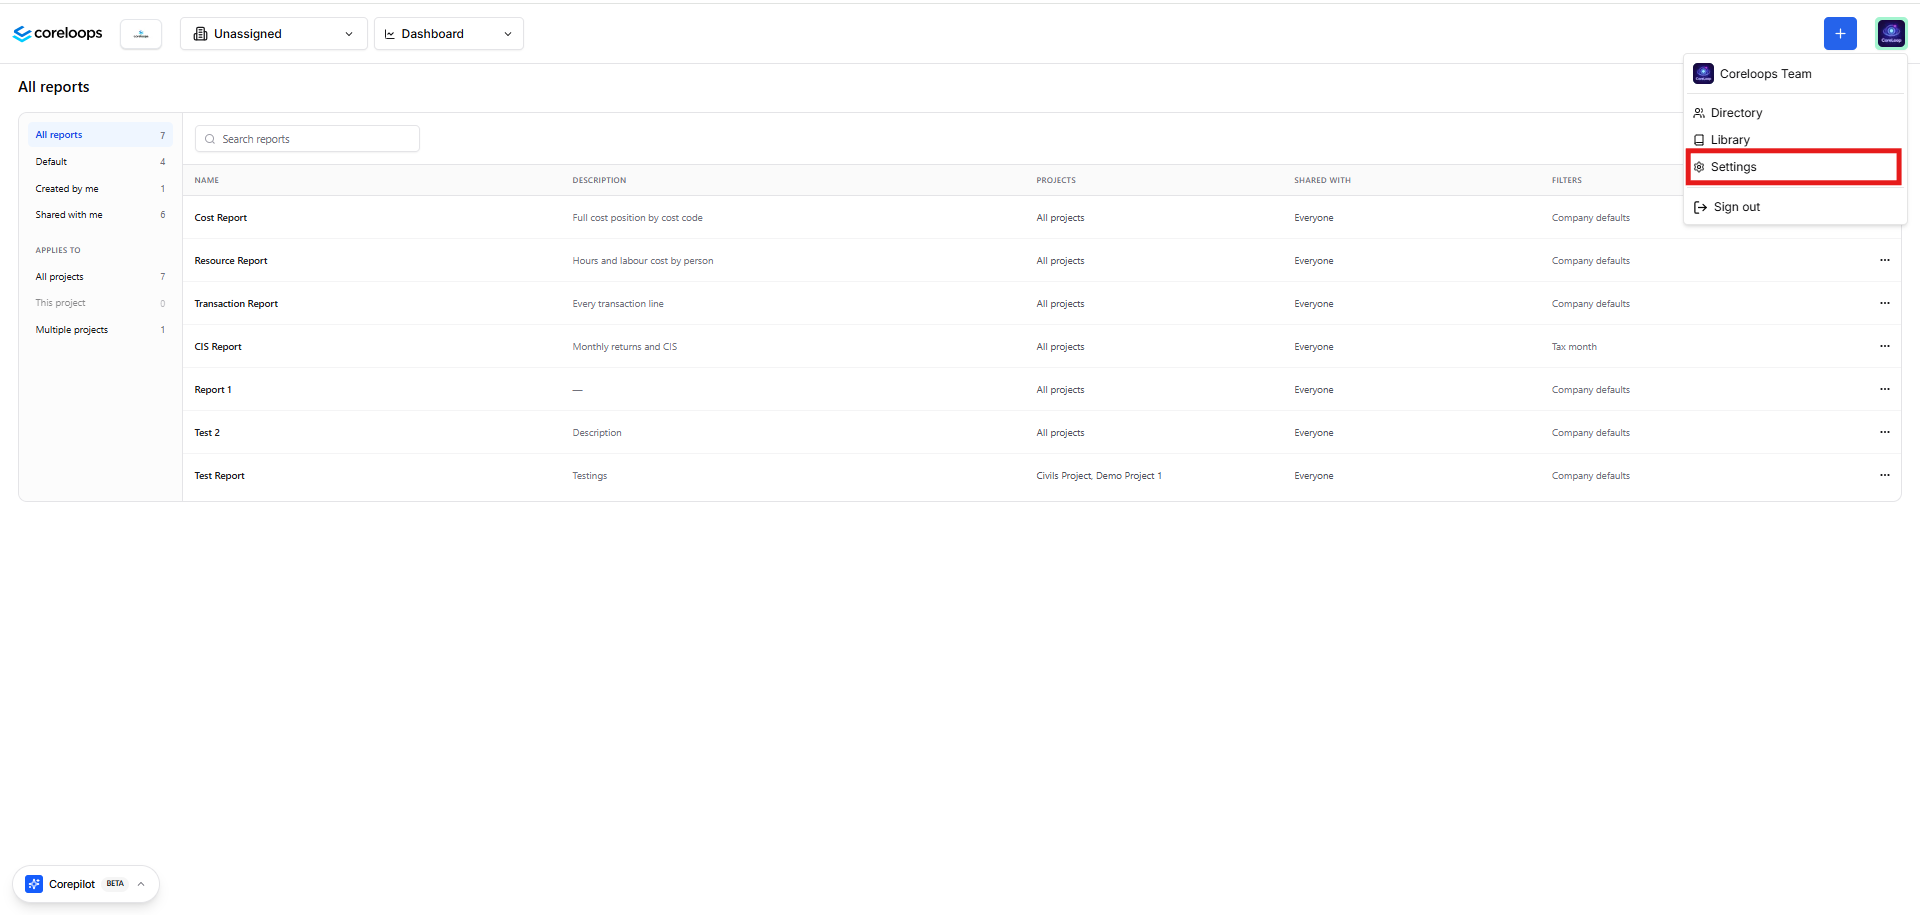
Head to the Settings tab, under your name in the right-hand corner.
Click on the Integrations tab

Select the accounting tool you want to connect to.
You’ll be redirected to the authentication page to log in and authorise Coreloops to access your accounting system.
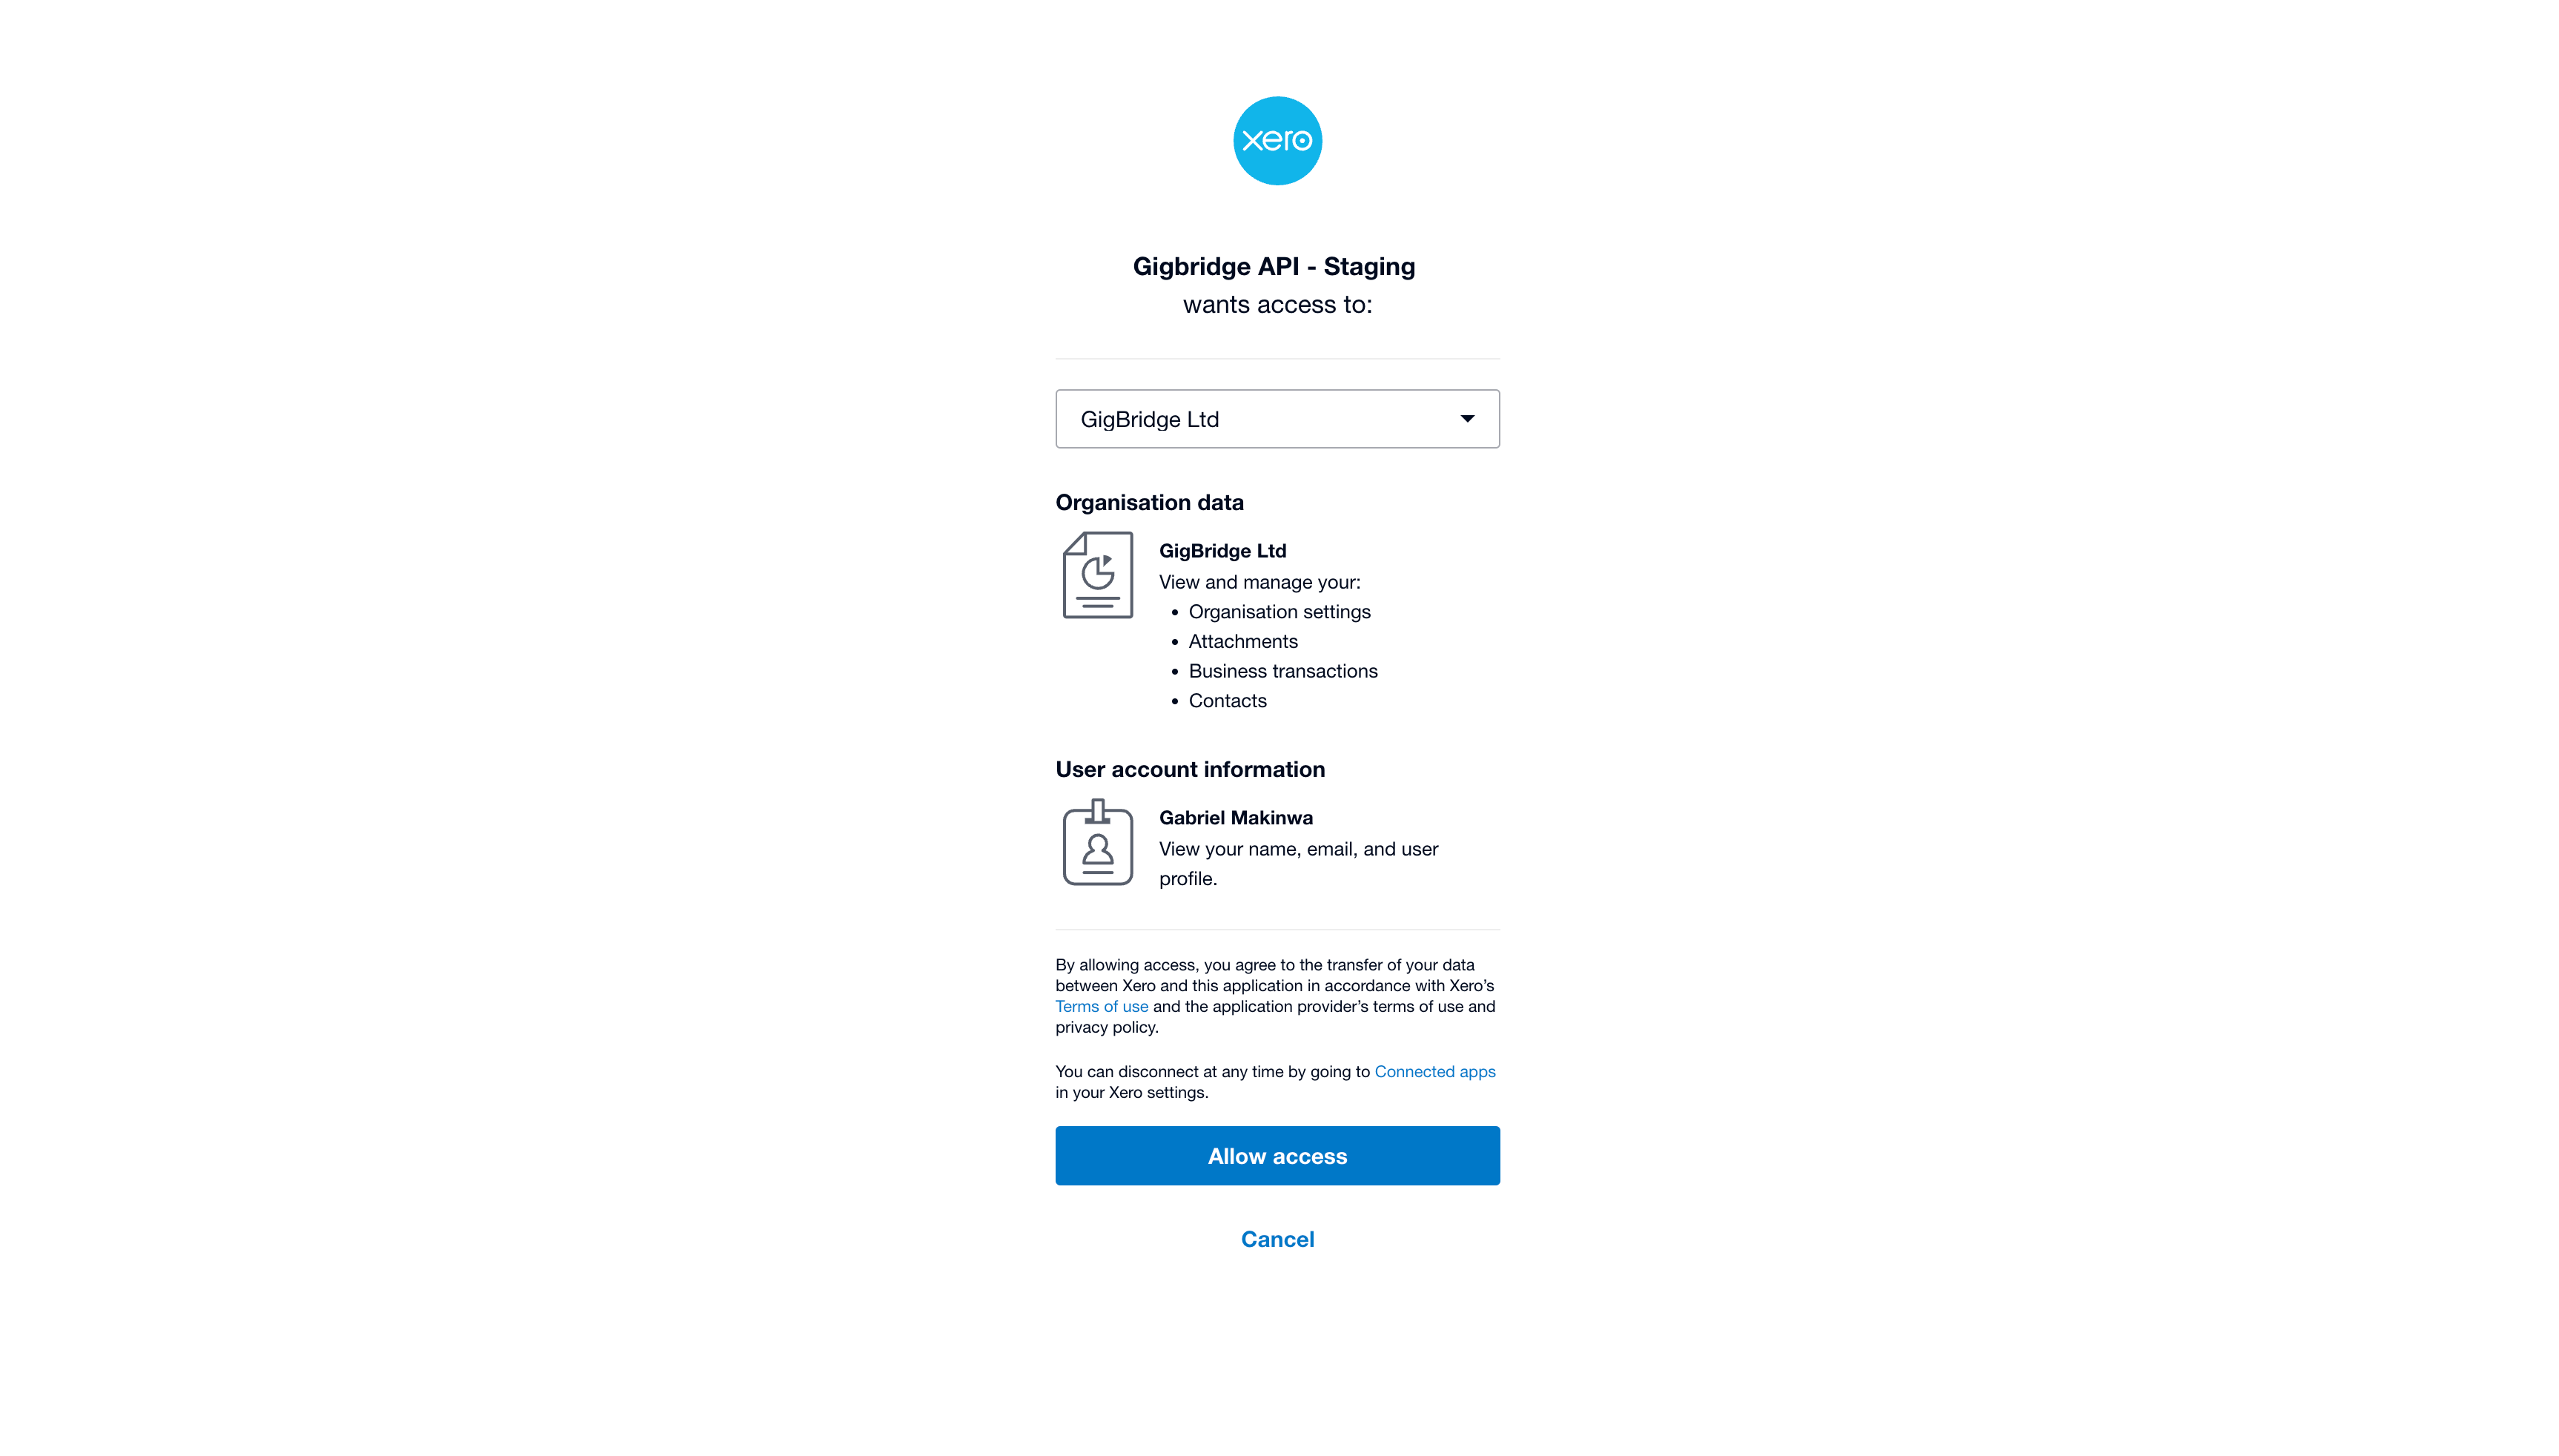
Once you’ve connected your accounting software and allowed access to your account, you will see the connected label beside the Accounting Software on the integrations page.

You'll be prompted to finish your setup by completing your sync settings. This is where you set the direction you want your data to be synced. For each document and contact type, you can choose from:
Coreloops to Accounting Software: Documents will only sync from Coreloops to your Accounting Software. This means documents created in your Accounting Software will not feed into Coreloops
Accounting Software to Coreloops: Documents will only sync from Accounting Software to Coreloops. This means documents created in Coreloops will feed into your Accounting Software
Both ways: Documents created in either software will sync between both Coreloops and your Accounting Software
Don't Sync: Nothing will be synced
Cost & Sales Settings
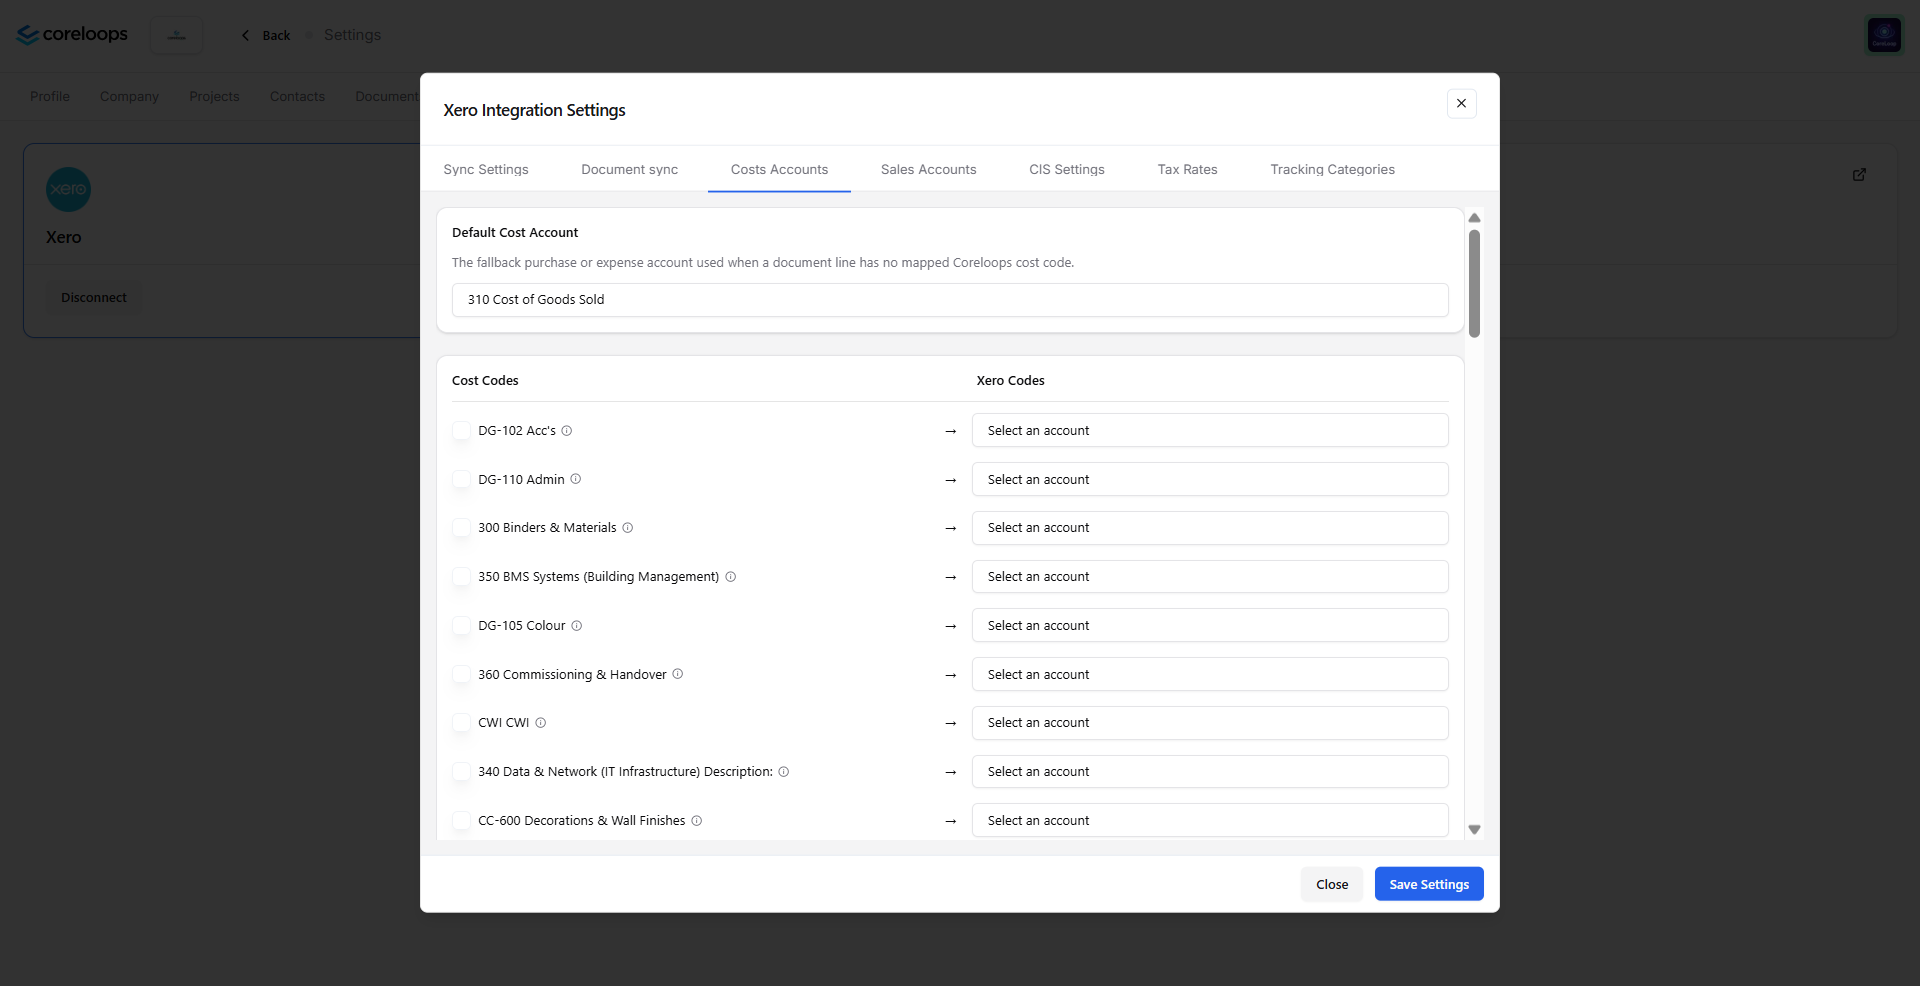
Here you can map your Coreloops cost codes to specific accounts in your accounting software. This determines which accounts specific purchase invoices and sales invoices are synced to. You can also set the default chart of accounts that all of your purchases and sales invoices will be allocated to when synced.
You can set a default Code that all items get mapped to in your accounting software. Account codes can also be set at both the document and line level.
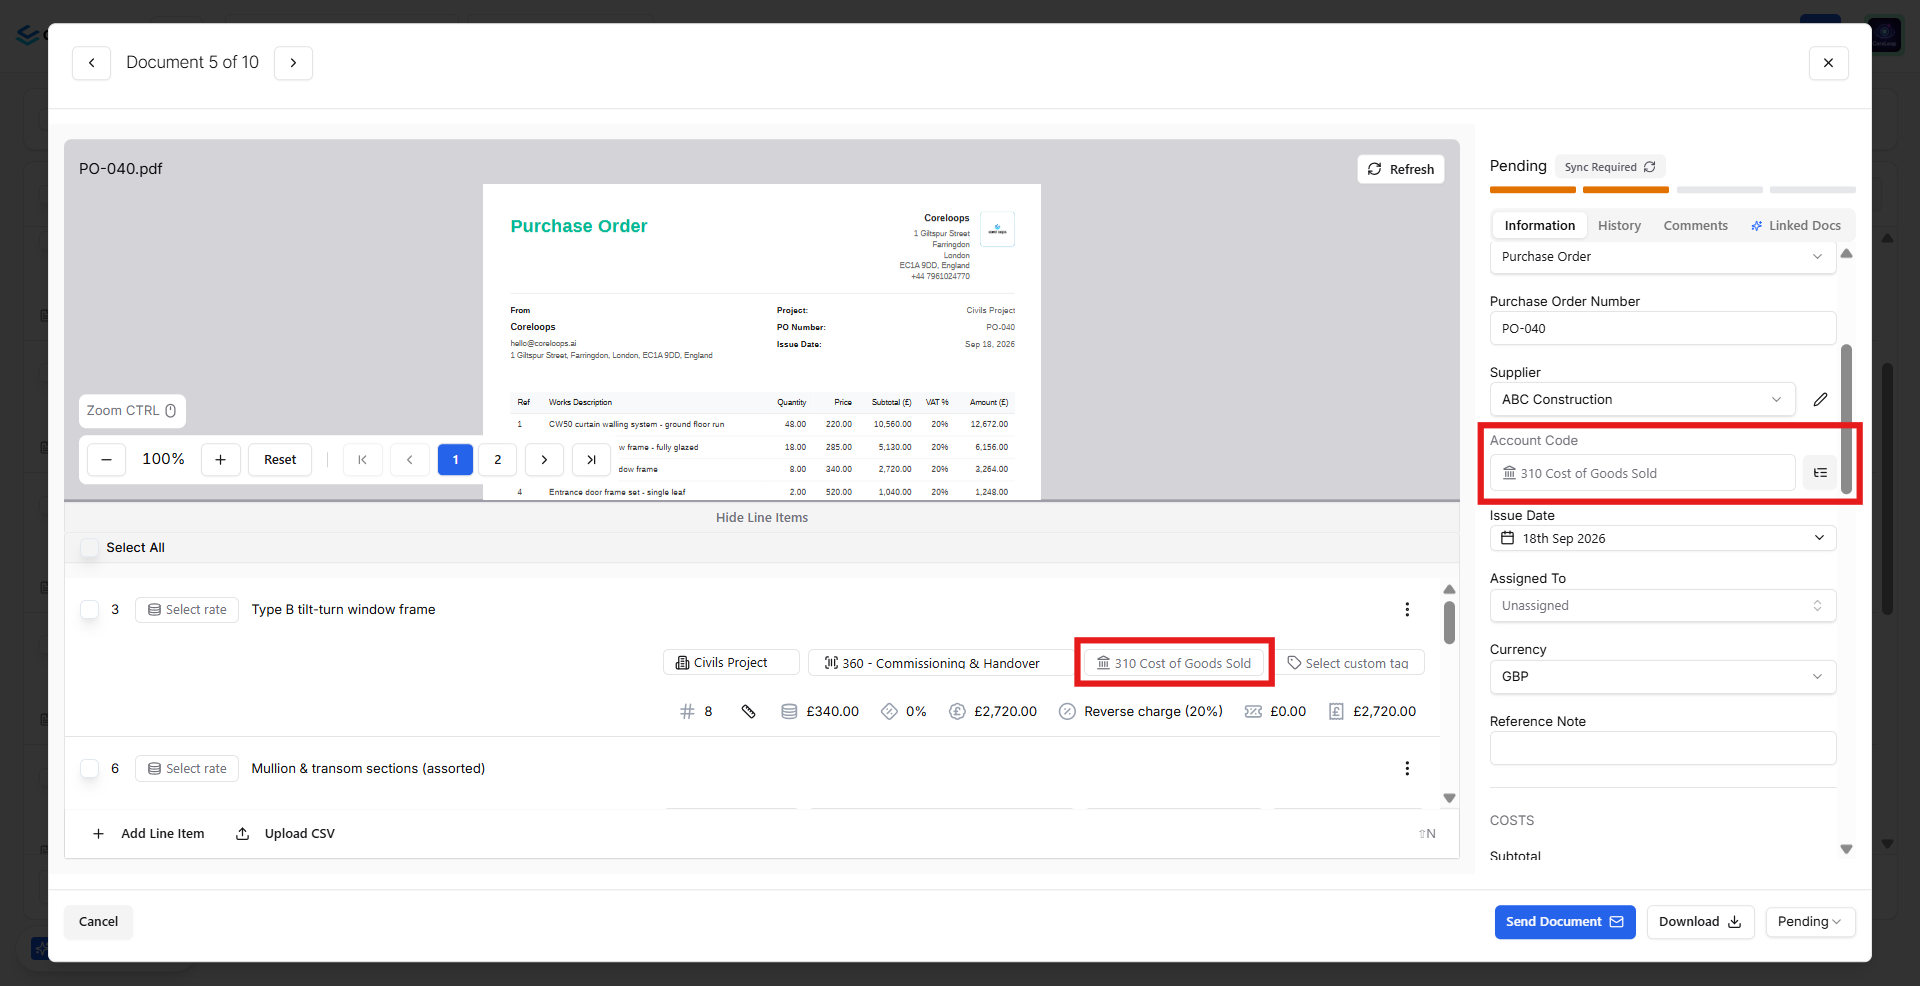
Note: When a document is split and allocated to several different cost codes, it will be sent to Accounting Software as one purchase with a line item for each part of the split purchase. Each line item will be allocated to the connected account or the default account, if codes haven't been synced.
Note: The chart of accounts is a list of all accounts you can use to record your transactions in your accounting software. It helps you categorise your transactions correctly and group similar accounts together to generate reports about your organisation.
Now that you've connected your Accounting software, you can do a few more things to ensure your purchases processed in Coreloops are synced correctly.
Import your contacts
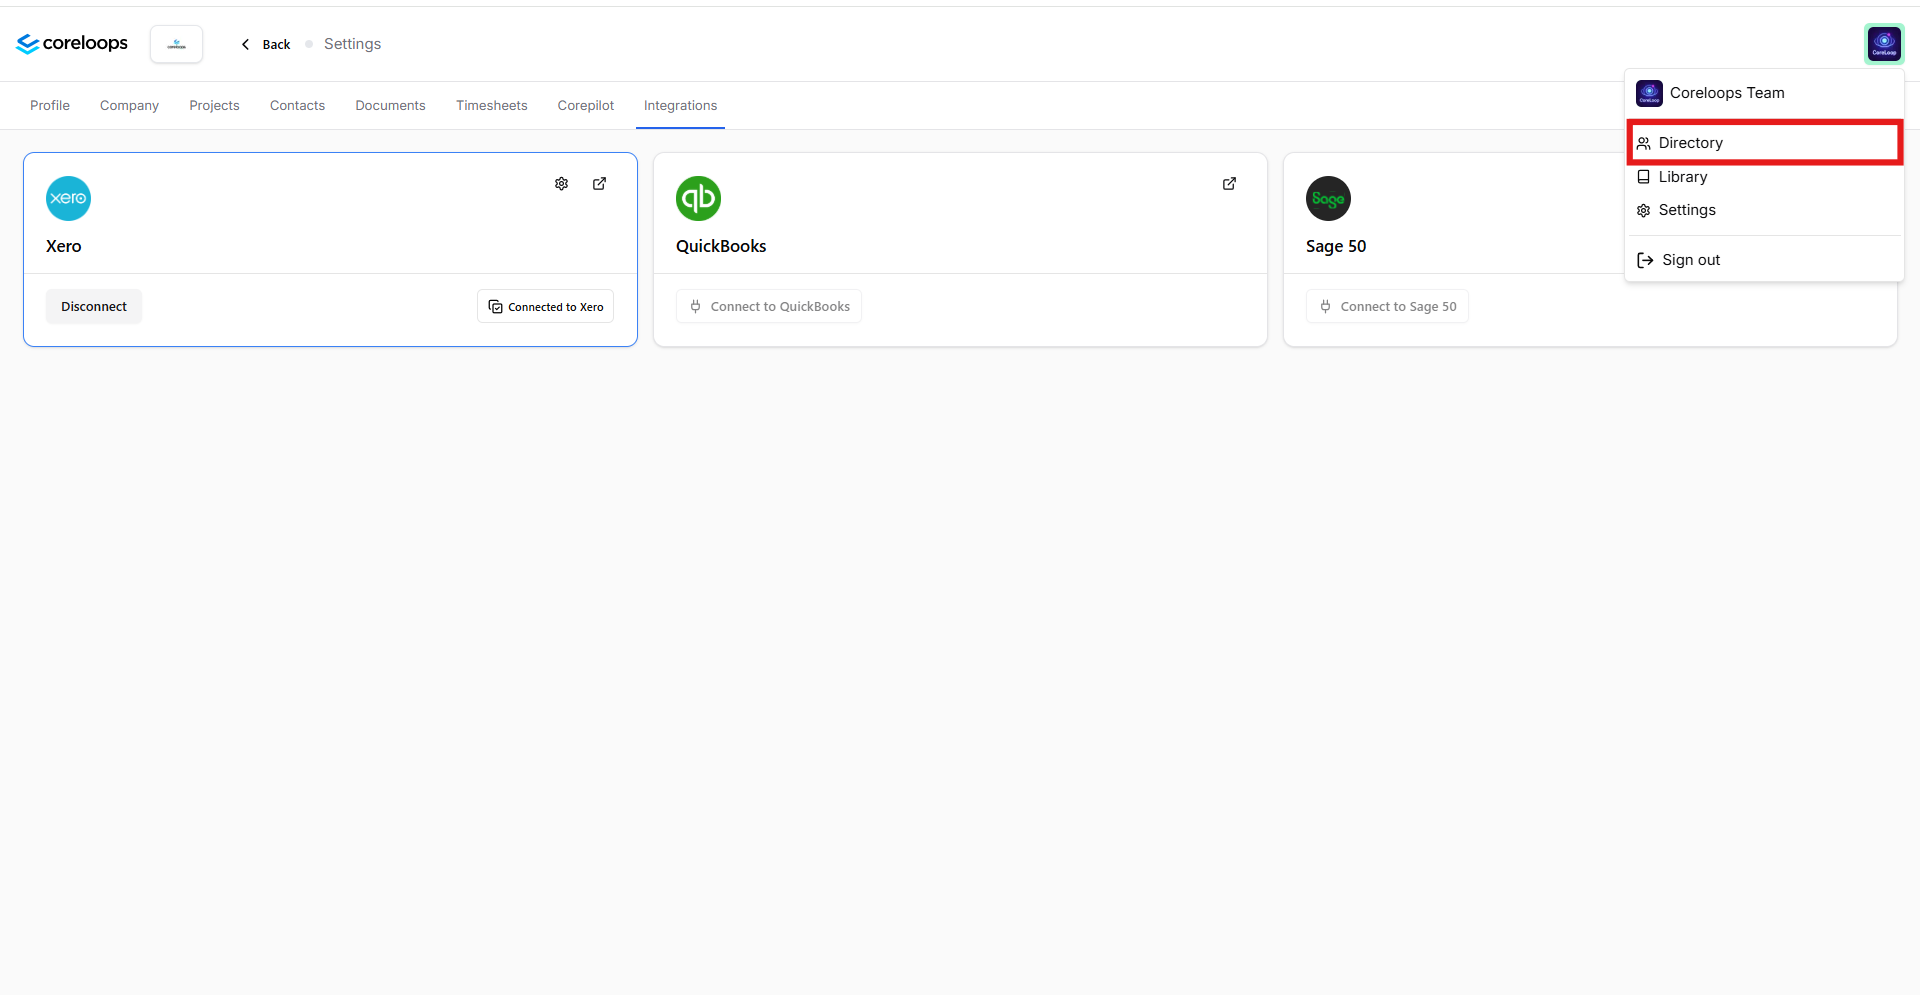
The integration settings also allow you to sync your contacts into Coreloops. In the Sync Settings tab in the accounting integration settings, you will find sync settings for Contacts; here you can choose which way your contacts will flow. Once you've set the sync direction for contacts. Head over to the directory tab by clicking on 'Directory' in the menu under your initials in the right-hand corner to find the contacts, suppliers and clients that have synced in.
Document Sync Settings
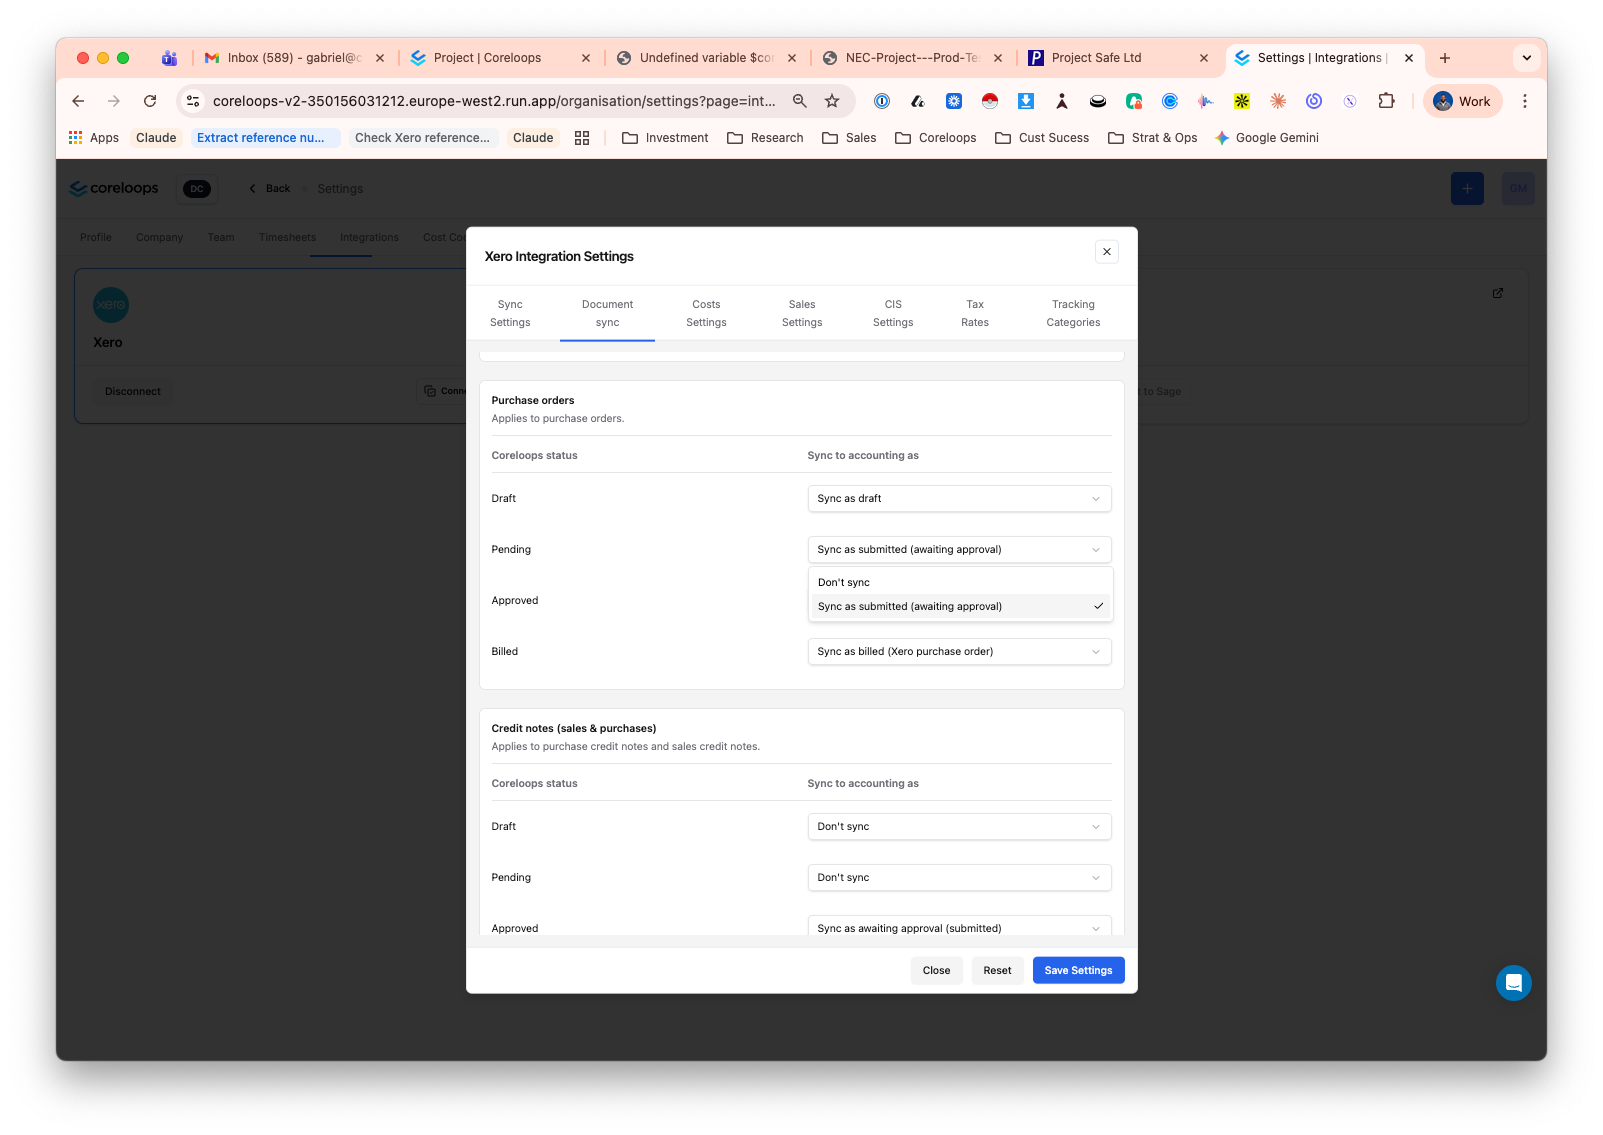
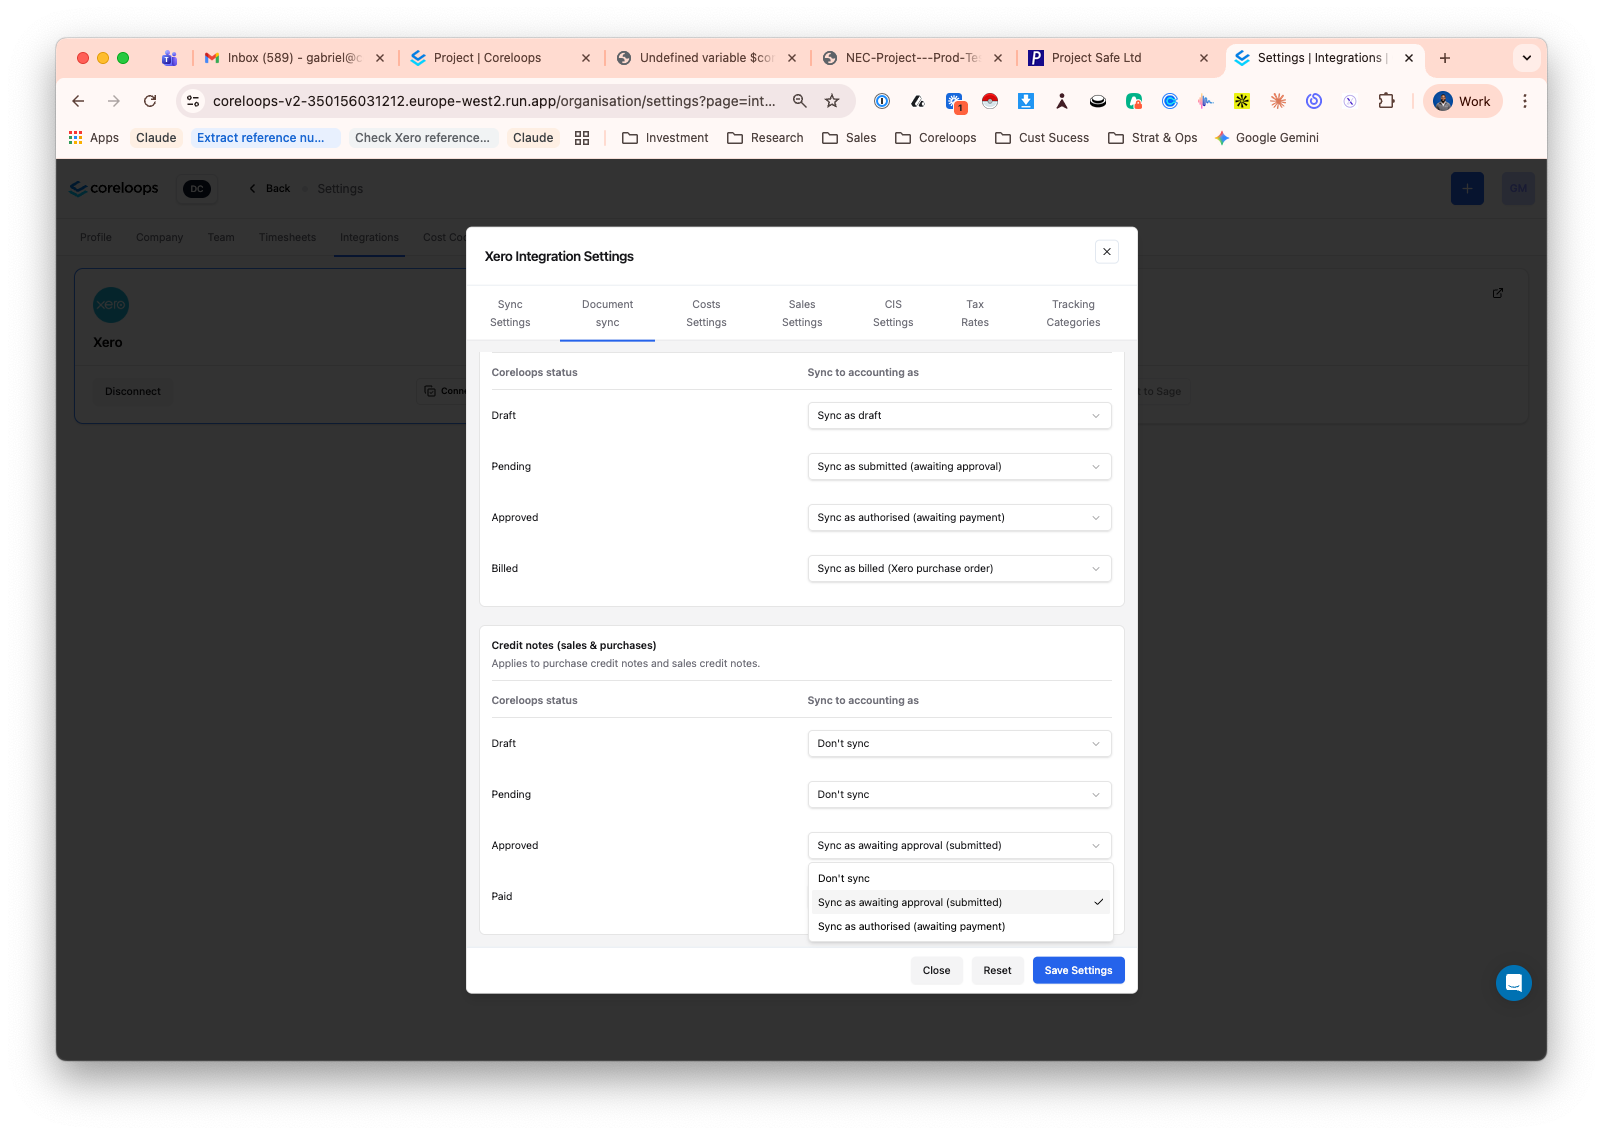
When syncing documents to your accounting software, you can choose which status a document is mapped to based on the status in Coreloops at the time of syncing.
For each of the following document types, you can configure how statuses are mapped and how documents are synced.
Invoices (sales & purchases) - Sync status settings
Purchase Orders - Sync status settings
Credit Notes - Sync status settings
Linking Cost Codes to the Chart of Accounts
One of our most useful features on Coreloops is the ability to connect your project cost codes, e.g. E005 - electrical containment or SUB002 - Drylining to the relevant chart of accounts (nominal codes), e.g. "Cost of Sales" in your accounting software. This enables you to allocate your purchases and costs to detailed cost codes in Coreloops and have them automatically synced to your accounting software with the right chart of accounts and tax details pre-filled. This will save your admin team hours of double data entry into your accounting software and then again into project cost reports.
You can link your cost codes to accounts in project settings.
Connect Cost Codes to Chart of Accounts
When syncing your purchases to Coreloops, you can configure which of your accounts they are synced to by connecting your cost codes.
Head over to Integration settings, then click on the Cost Settings Tab
Click on the accounting software Code box for each cost code
Select which chart of accounts each cost code should be synced to. By syncing a cost code to a chart of accounts, each document (or part of it) assigned to this cost code will be sent into your accounting software and categorised to the respective account.
Note: You can also set a default account that all cost codes that have not been mapped will be linked. For example, if you create a new cost code and it hasn't been linked to an account, any document line items linked to that cost code will be synced against the default account, e.g., Cost of Goods Sold or Suspense.
You can also repeat the same process for sales invoices. This will enable you to break down your sales invoices by cost code but link them to one chart of accounts e.g. Sales or Services.
CIS Settings
If you verify and manage your CIS subcontractors in your accounting software you can set up Coreloops to sync your bills in the right way to enable seamless CIS reporting and monthly returns.
To enable CIS in Coreloops, head over to your accounting integration settings on the Company Settings page.
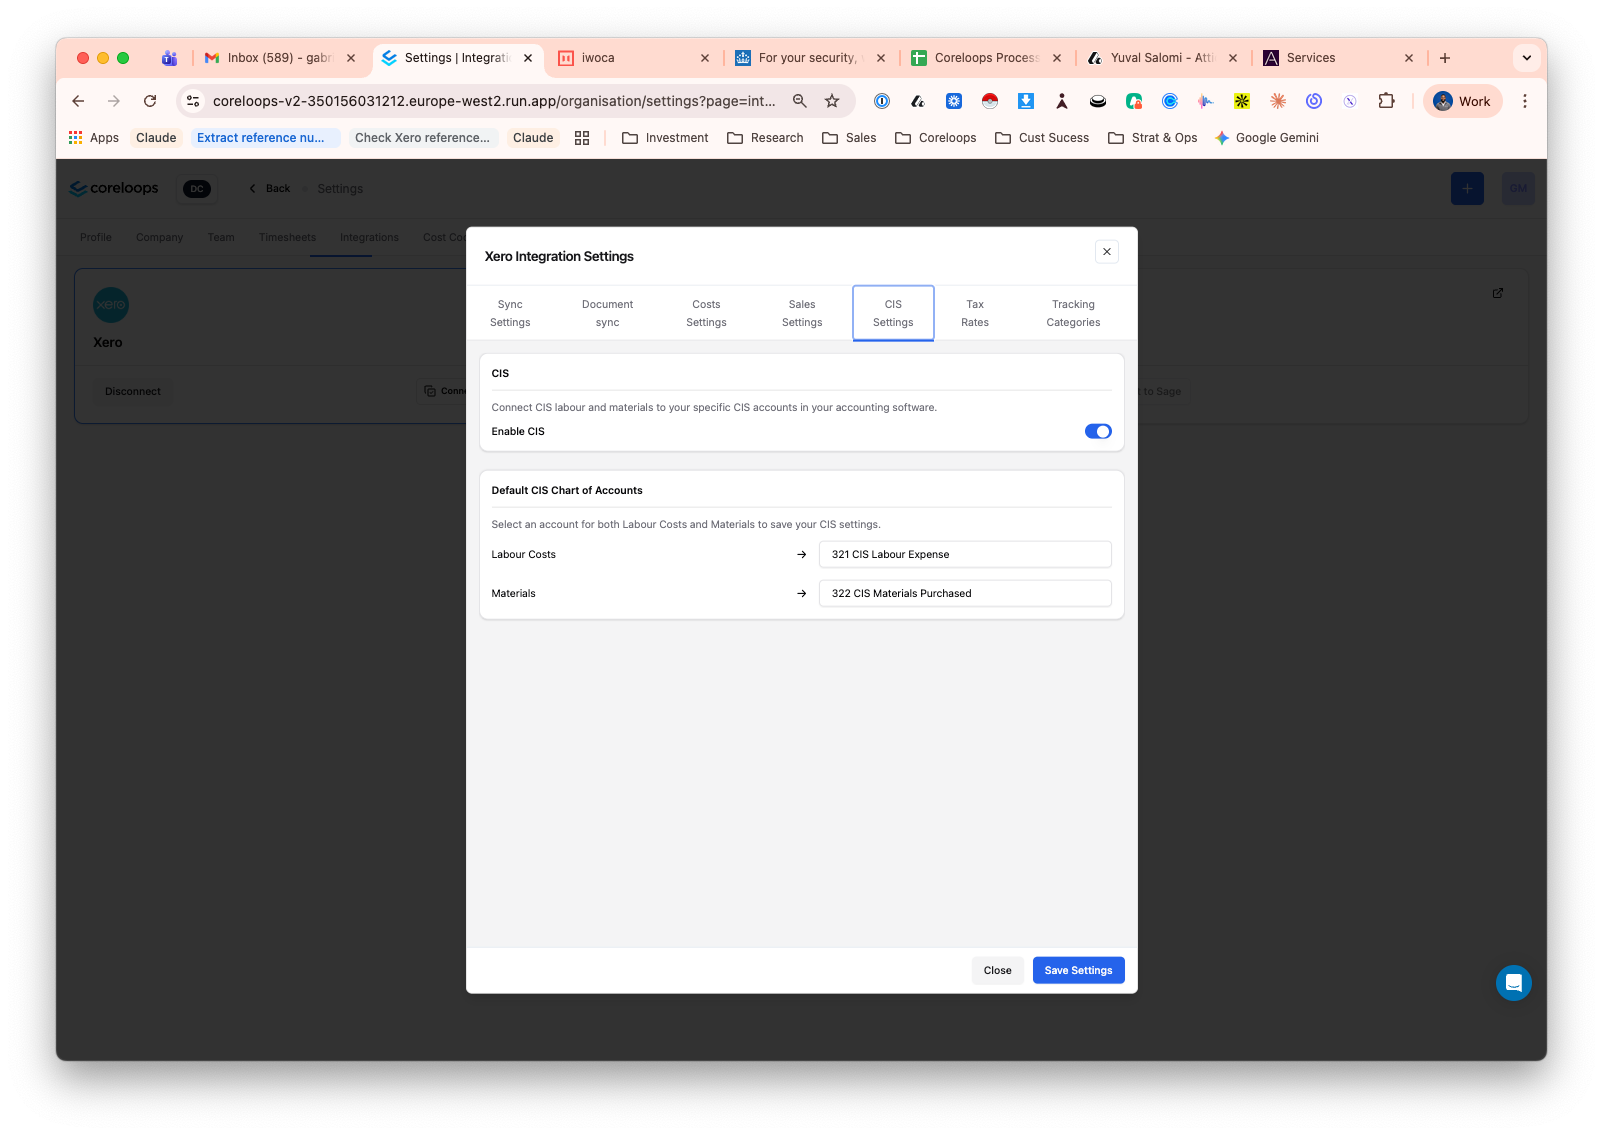
Toggle on the "Enable CIS" button.
Select an account for
Labour Cost: Your CIS labour account, typically 321 - CIS Labour Expense
Materials Costs: Your CIS Materials account is typically 322 CIS Materials Purchases.
Once enabled, all invoices that include a CIS tax amount will be synced with two line items: one for CIS Labour (where the tax rate is applied) and another for materials (where the tax rate is not applied). If the supplier/contact has CIS enabled in your accounting software, this will automatically calculate the CIS tax to be deducted and update your monthly returns once approved.
Map Tax Rates
In Coreloops, you can map VAT rates in Coreloops to specific VAT rates in your accounting software. This ensures that when documents are synced into they have the correct tax rates applied.
Head to Integration Settings
Go the Tax Rates tab
Map each tax rate to a VAT rate for both expenses and sales.
Tracking categories
If you use tracking categories in your accounting softawre for projects, you can map your projects in Coreloops to specific tracking categories in your accounting software. This will ensure that any document synced is automatically allocated to the linked tracking category.
To set this up
Head to Integration settings
Click on Tracking Categories
Select a tracking category for each project.
Note that these must be set up in your accounting software first, and you can map projects to only one set of tracking categories.
Was this helpful?
Still need help? Ask the team