How to import a Bill of Quantities (BOQ)
Written By Gabriel Makinwa
Last updated About 1 month ago
Coreloops lets you import your existing Bill of Quantities directly from an Excel spreadsheet, so you can set up your project structure without entering line items manually. Once imported, your sections, subsections, and line items are ready to assign cost codes against — giving your cost report and project dashboard a complete budget baseline from day one. This guide covers how to prepare your spreadsheet and walk through each step of the import wizard.
Before you start: Prepare your spreadsheet
File format
Your file must be an Excel file (.xlsx). CSV and Google Sheets formats are not supported. If you work in Google Sheets, download your file first: File → Download → Microsoft Excel (.xlsx).
Sheet structure
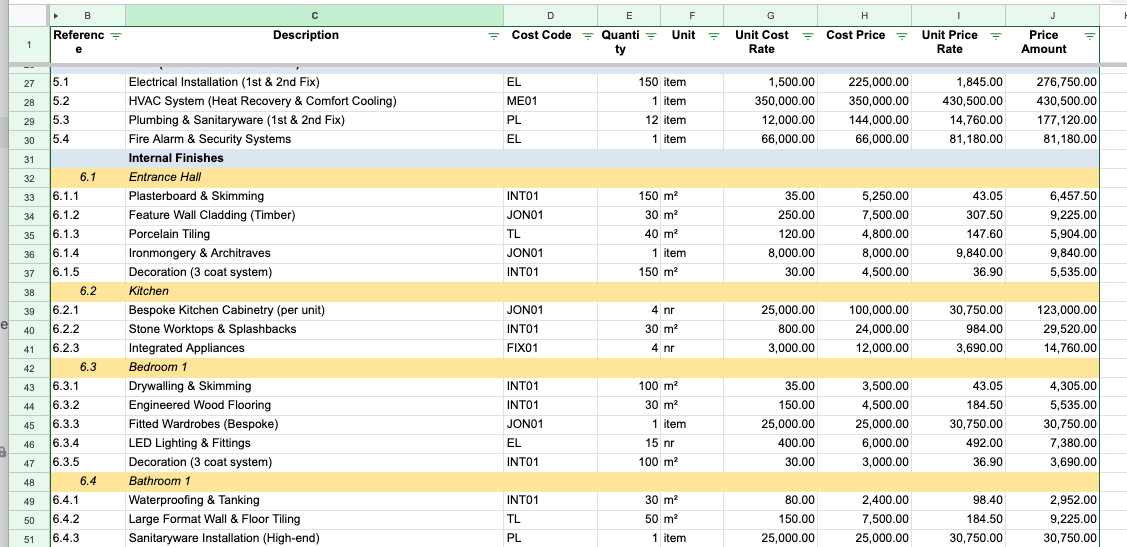
Remove any summary rows, total rows, or project header rows at the top. Your sheet should start at the column header row (e.g. Description, Quantity, Unit, Rate).
If your net costs and gross costs are in separate files or tabs, merge them into a single sheet side by side before importing.
Use a single Description column for both section headings and line item descriptions.
Colour-code your sections and subsections (recommended)
Colour coding is the fastest way to import — Coreloops detects your formatting and automatically identifies your structure.
Sections (e.g. Substructure, Superstructure): highlight in one colour (e.g. blue)
Subsections (e.g. Excavation, Enabling Works): highlight in a different colour (e.g. yellow)
Line items: leave unformatted
Step-by-step: Import your BOQ
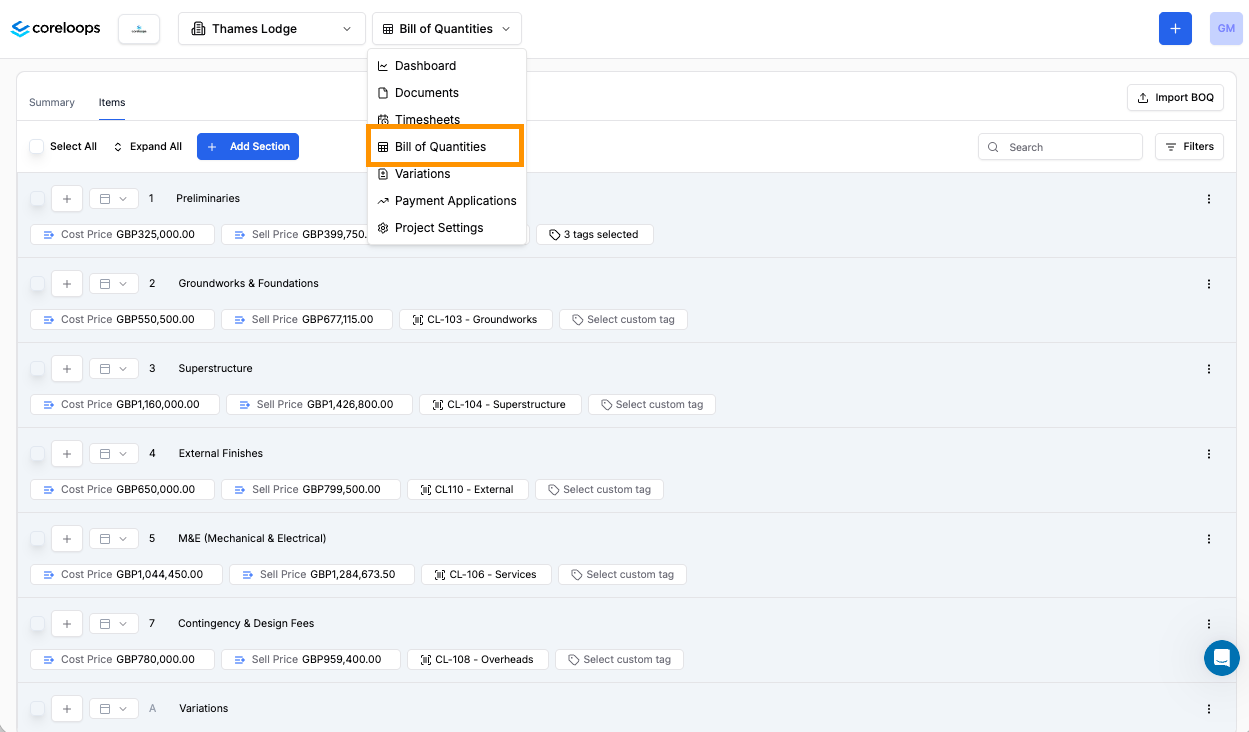
Step 1 — Navigate to Bill of Quantities
Open your project and go to the Bill of Quantities module.
Step 2 — Click Import BOQ
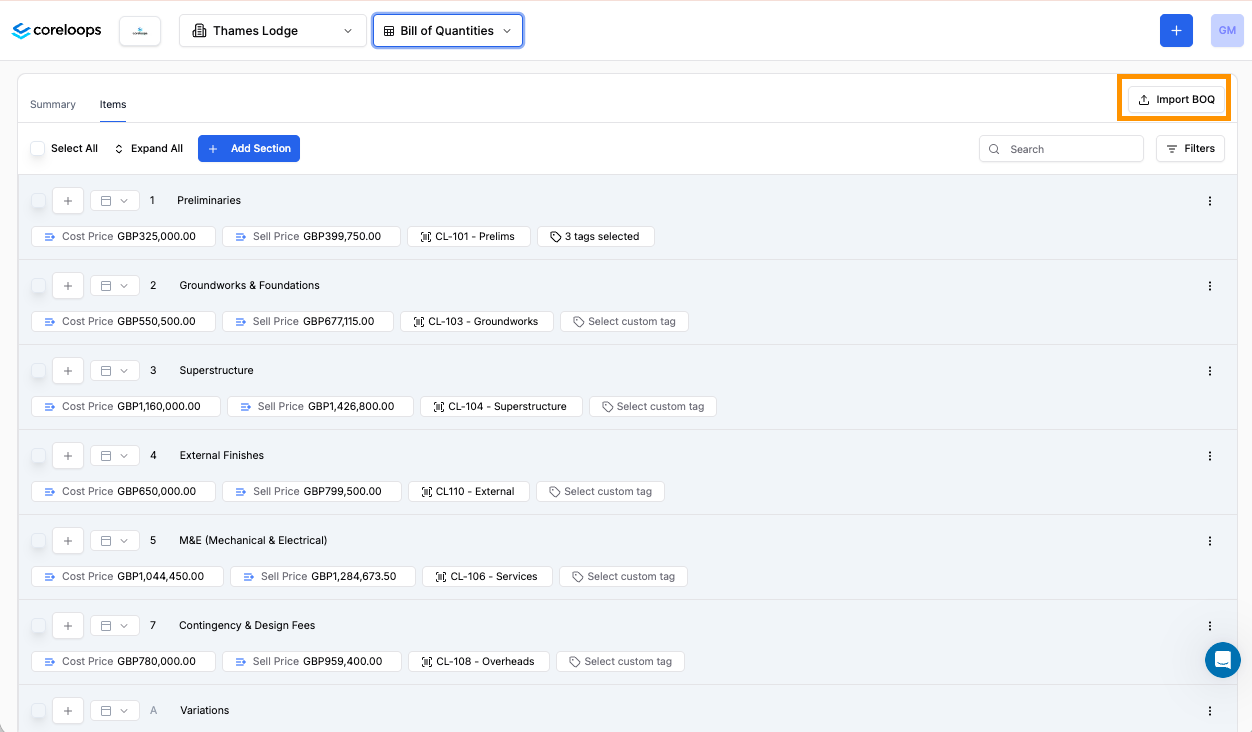
Click Import BOQ in the top-right corner of the screen.
Step 3 — Choose Manual Import
Select Manual Import from the options shown and click the upload box to browse for your .xlsx file. Click Continue once your file is selected.
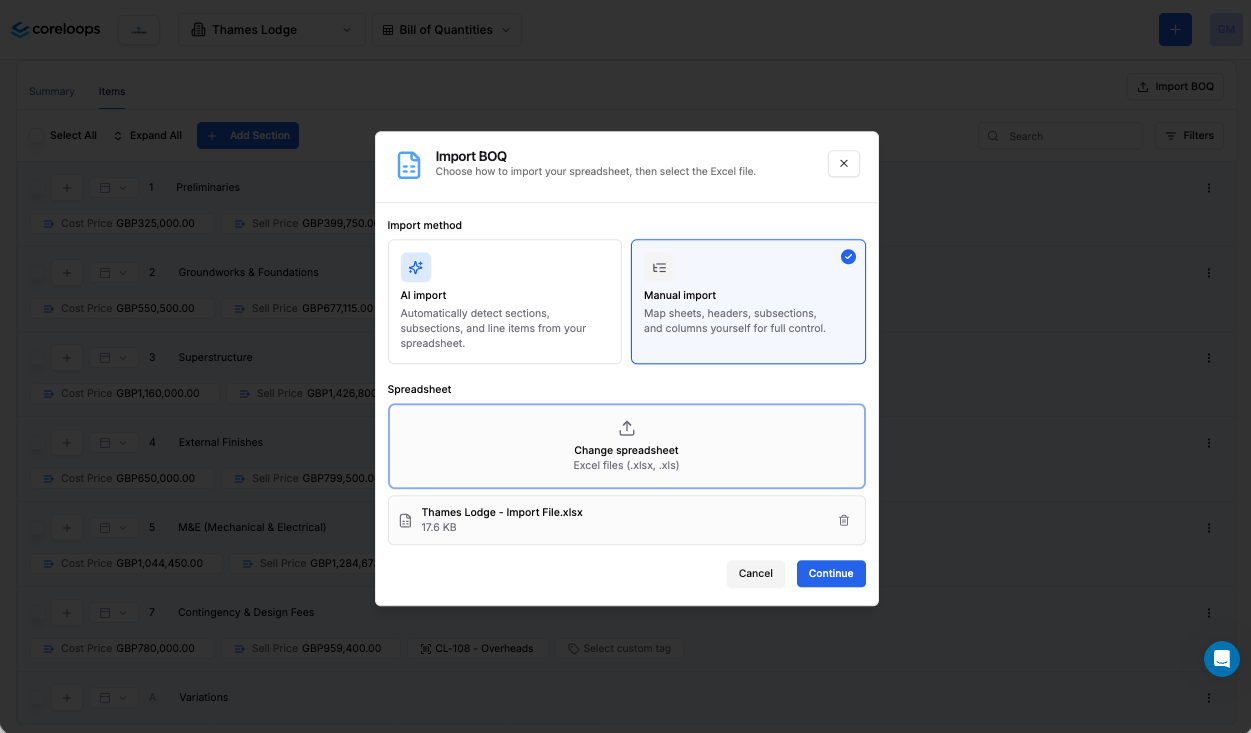
Note: Drag and drop is not currently supported — use the file picker.
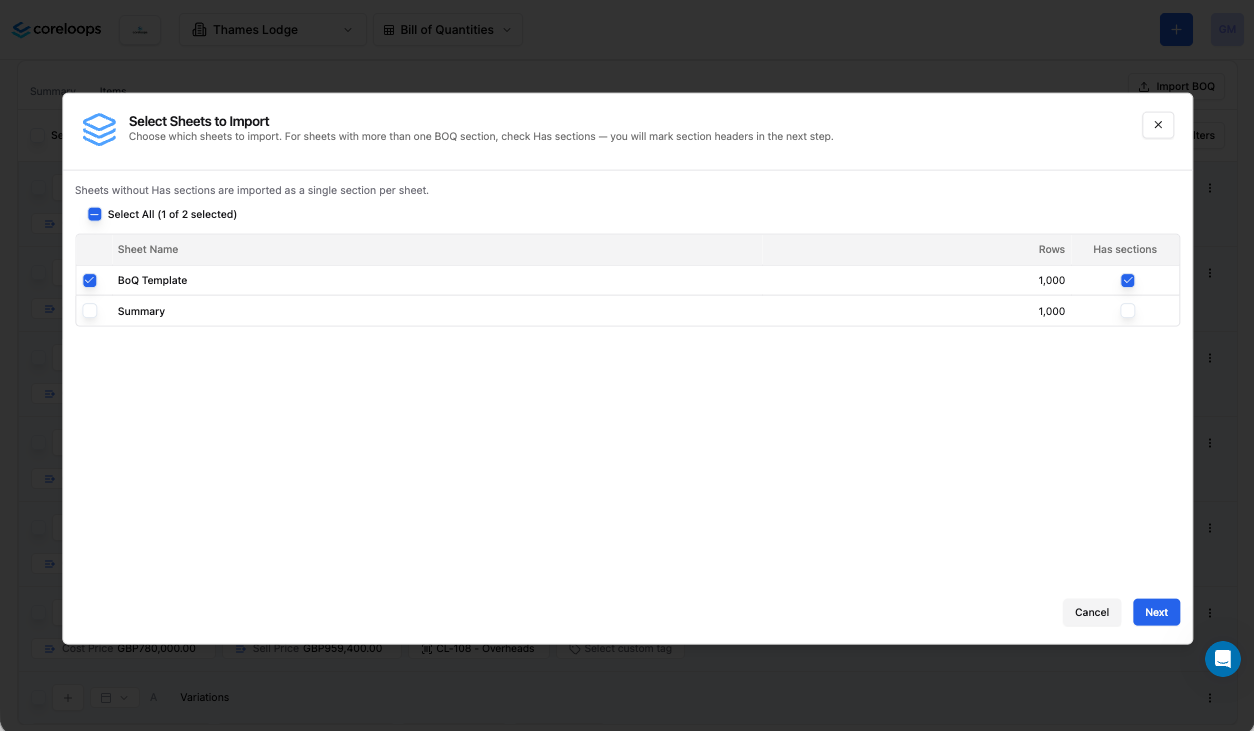
Step 4 — Select your tabs
The system shows all the tabs in your spreadsheet. Select the tabs you want to include in this import.
If a tab contains multiple sections within it (rather than one section per tab), tick Has sections for that tab.
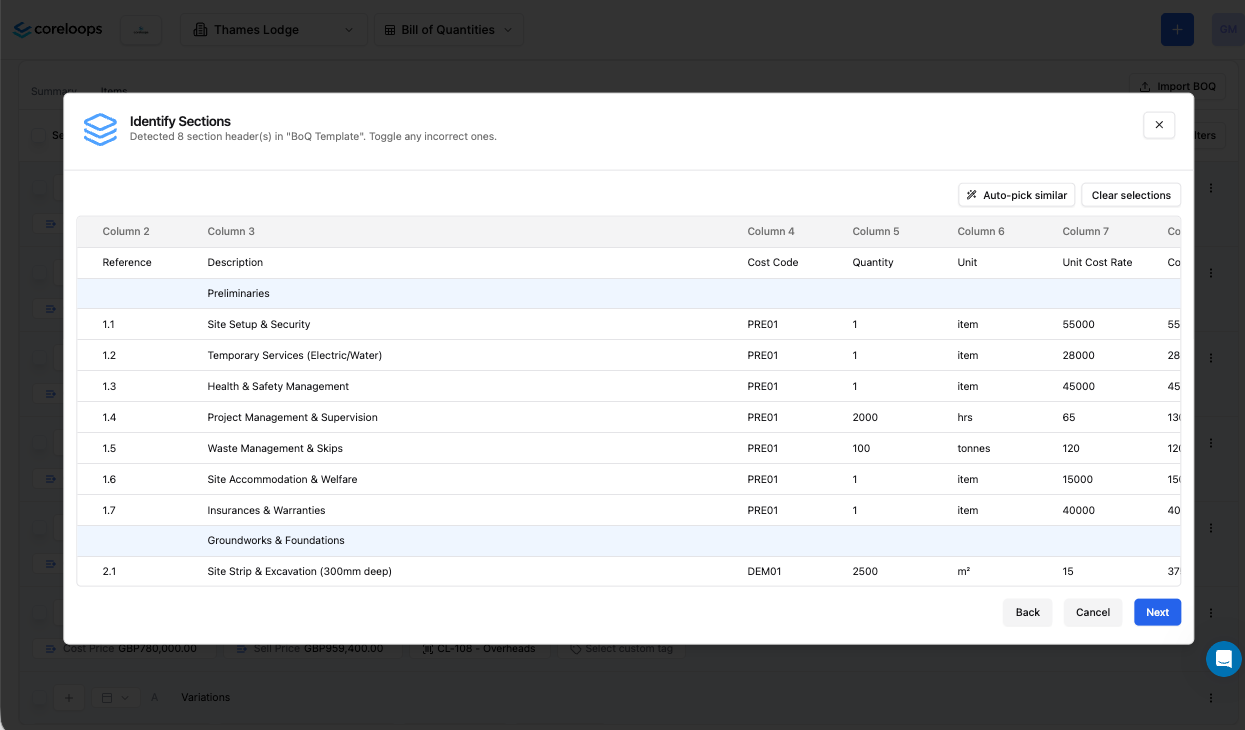
Step 5 — Identify your sections
Click on a row that represents a section header. If you've colour-coded your sections, the system automatically detects all rows with the same colour and confirms the count — for example: "9 section headers detected".
Scroll through to check the highlighted rows look correct, then click Next.
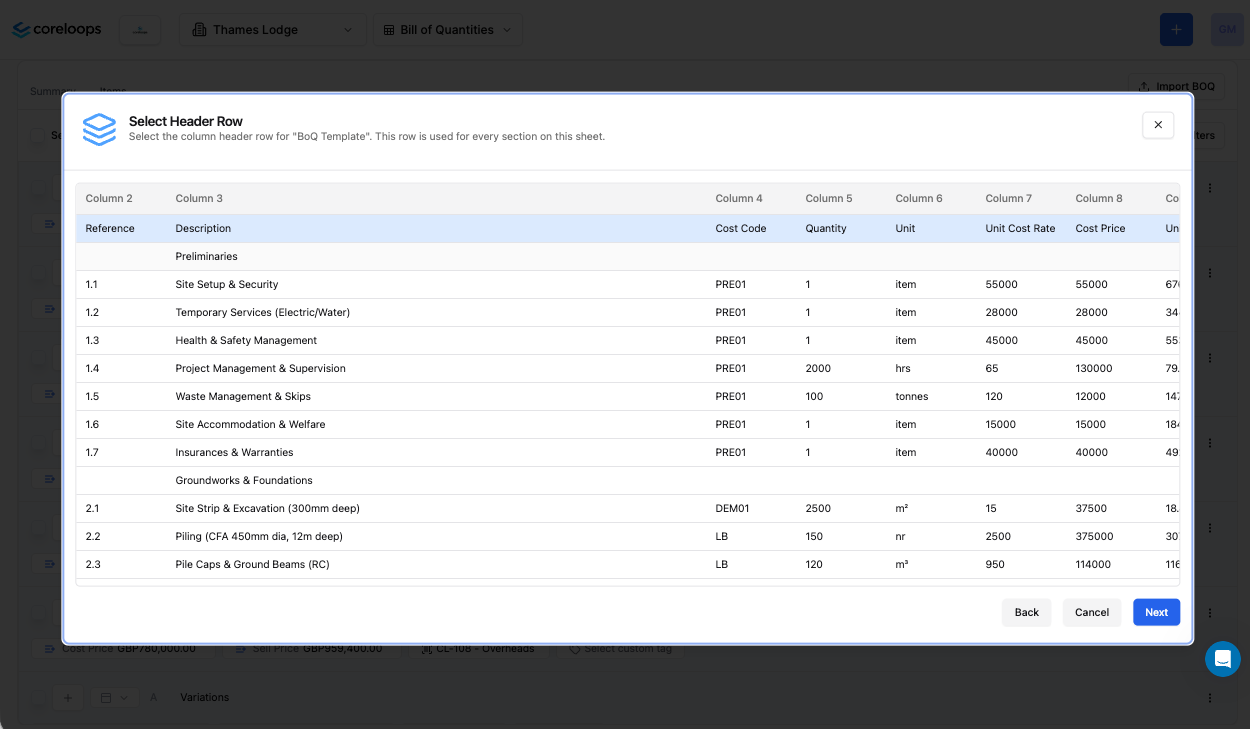
Step 6 — Select your header row
Click the row that contains your column titles (Description, Quantity, Unit, Rate, etc.). This should be the first row in your cleaned-up sheet. Click Next.
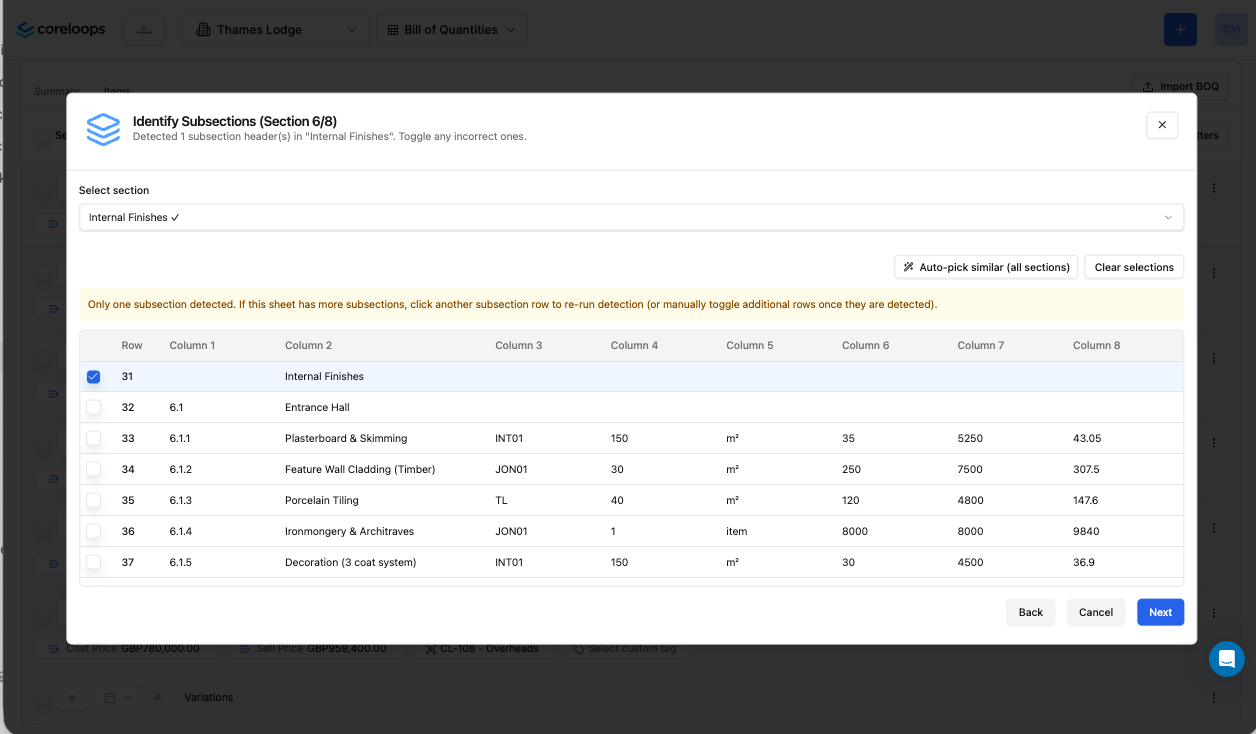
Step 7 — Identify your subsections
For each section, select the rows that are subsection headings. Once you've done two sections, you'll be asked whether to apply the same pattern to all remaining sections — click Apply to all to save time.
Click Next.
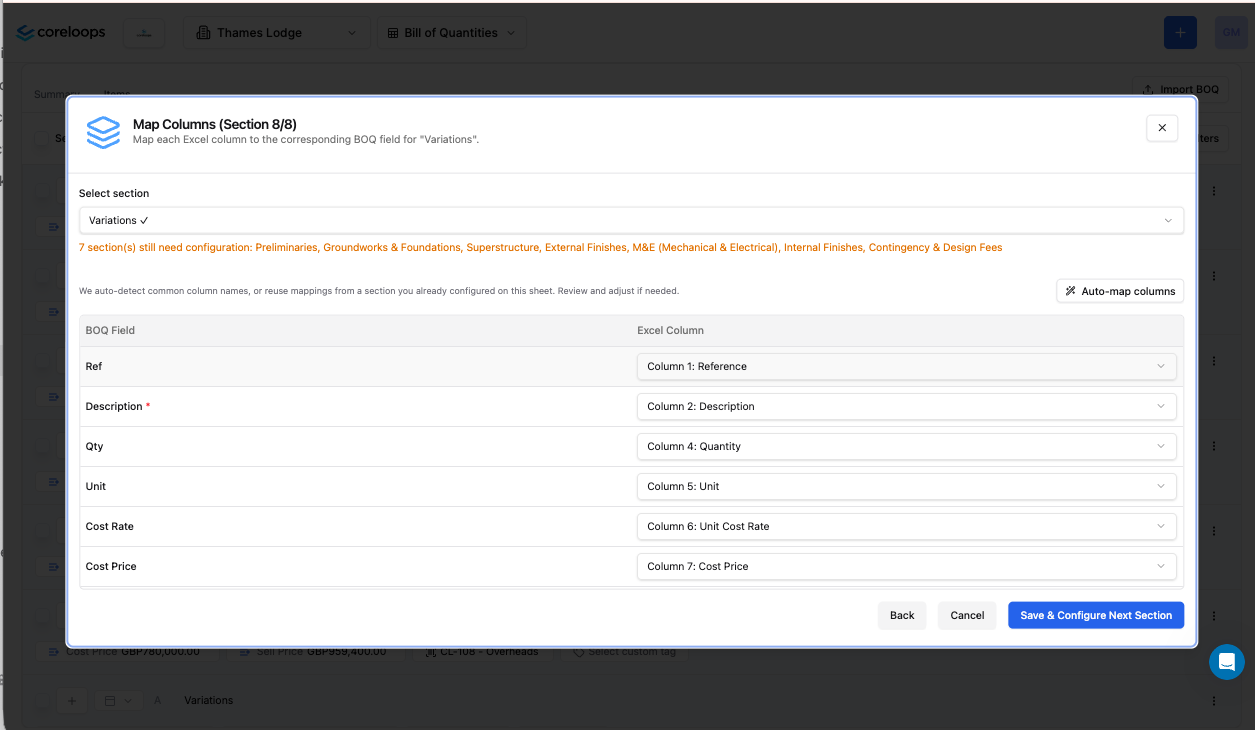
Step 9 — Map your columns
Match your spreadsheet column headers to the corresponding Coreloops fields. The system auto-maps where names match closely — review and correct any that are wrong.
Common mappings:
Description → Description
Quantity / Qty → Quantity
Unit → Unit
Net rate / Cost rate → Cost Rate
Gross rate / Sell rate → Sell Rate
Price / Subtotal → Cost Price
You can also map optional fields such as Cost Code and Tags if these are in your spreadsheet.
Repeat the mapping for each section if prompted, then click Next.
Step 10 — Preview and confirm
Review the import preview. Check that your sections and subsections appear in the right order, line items are under the correct subsection, and quantities and rates look correct.
If anything looks wrong, go back and fix your spreadsheet, then re-upload. If everything looks good, click Confirm to complete the import.
After the import: Assign cost codes
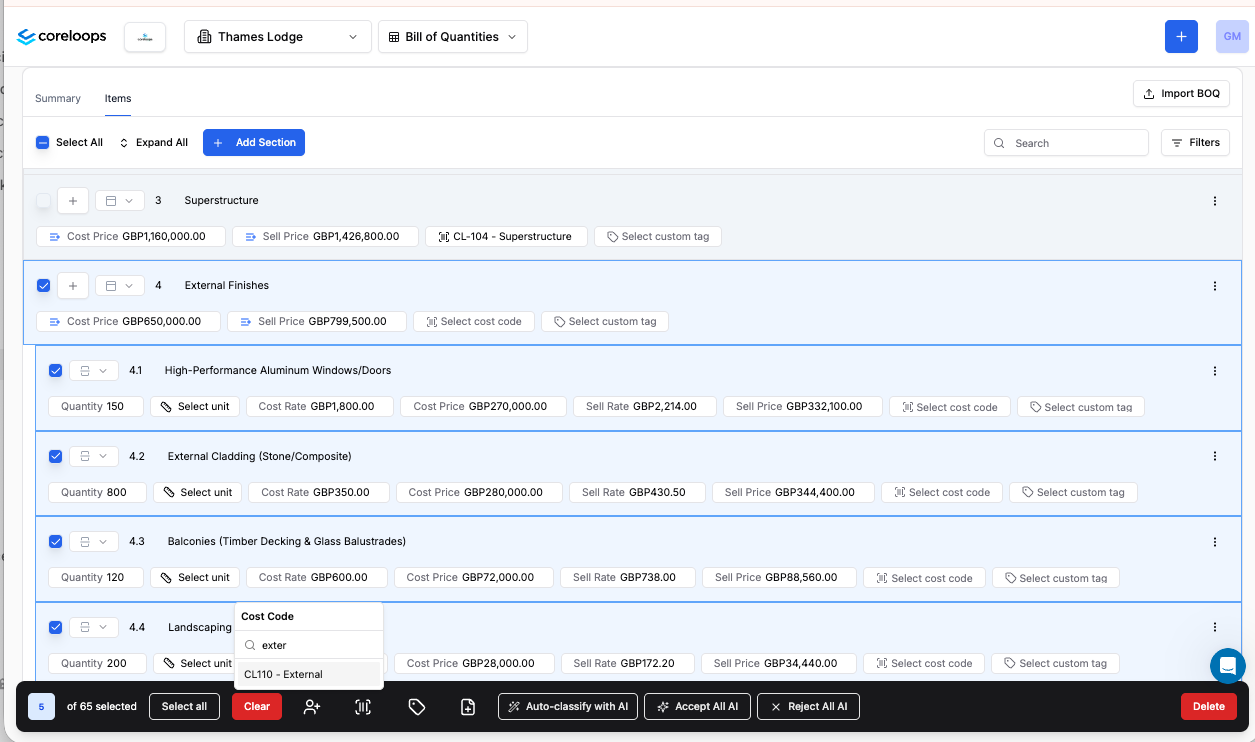
Once your BOQ is imported, you can assign cost codes to your line items in bulk:
Select the line items you want to assign — tick individual rows, or click a subsection to select all items within it.
Click Select cost code in the action bar.
Search for the cost code and select it.
All selected items will be assigned to that cost code.
Tips and troubleshooting
Line items appear blank after import — Check that the Description column is filled in for all rows in your spreadsheet. Rows with blank descriptions may not import correctly.
Sections not detected — If colour coding didn't work, manually click each section header row during the identification step.
Something imported incorrectly — Delete the BOQ and re-run the import with a corrected spreadsheet. The import does not partially update an existing BOQ.
File too large — Keep your Excel file under 10 MB.
Was this helpful?
Still need help? Ask the team