How to set up Cost Codes, Groups and Custom Tags
Cost Codes are a fundamental part of the Coreloops platform. They allow for granular tracking and reporting of project costs, income, and margins across your construction projects. This guide explains their purpose and walks through the setup process.
Written By Gabriel Makinwa
Last updated About 2 months ago
1. What Are Cost Codes Used For?
Cost Codes act as categories to help you allocate and monitor the financial elements of your projects. They are:
Assigned to line items in your Bill of Quantities (BoQ) to set expected benchmarks.
Automatically assigned to line items in documents (e.g. invoices, POs) and timesheets via Coreloops AI.
Used in reporting to break down metrics by cost category (e.g., Total Costs, Certified Value, Margin % by cost code).
Integrated across the platform, enabling you to:
View live valuations by cost code in payment applications.
Track cost impact from variations.
Analyse budget vs actuals across resources and financials.
2. Where to Set Up Cost Codes
Cost Codes are managed from the Platform Settings, accessible via the avatar menu in the top right:
Click your profile/avatar icon.
Select Settings.
Navigate to the Projects tab
From there, you will see the Cost Codes tab
Use the Cost Codes or Cost Groups subtabs to manage each type.

3. Creating Cost Codes
To create a new Cost Code:
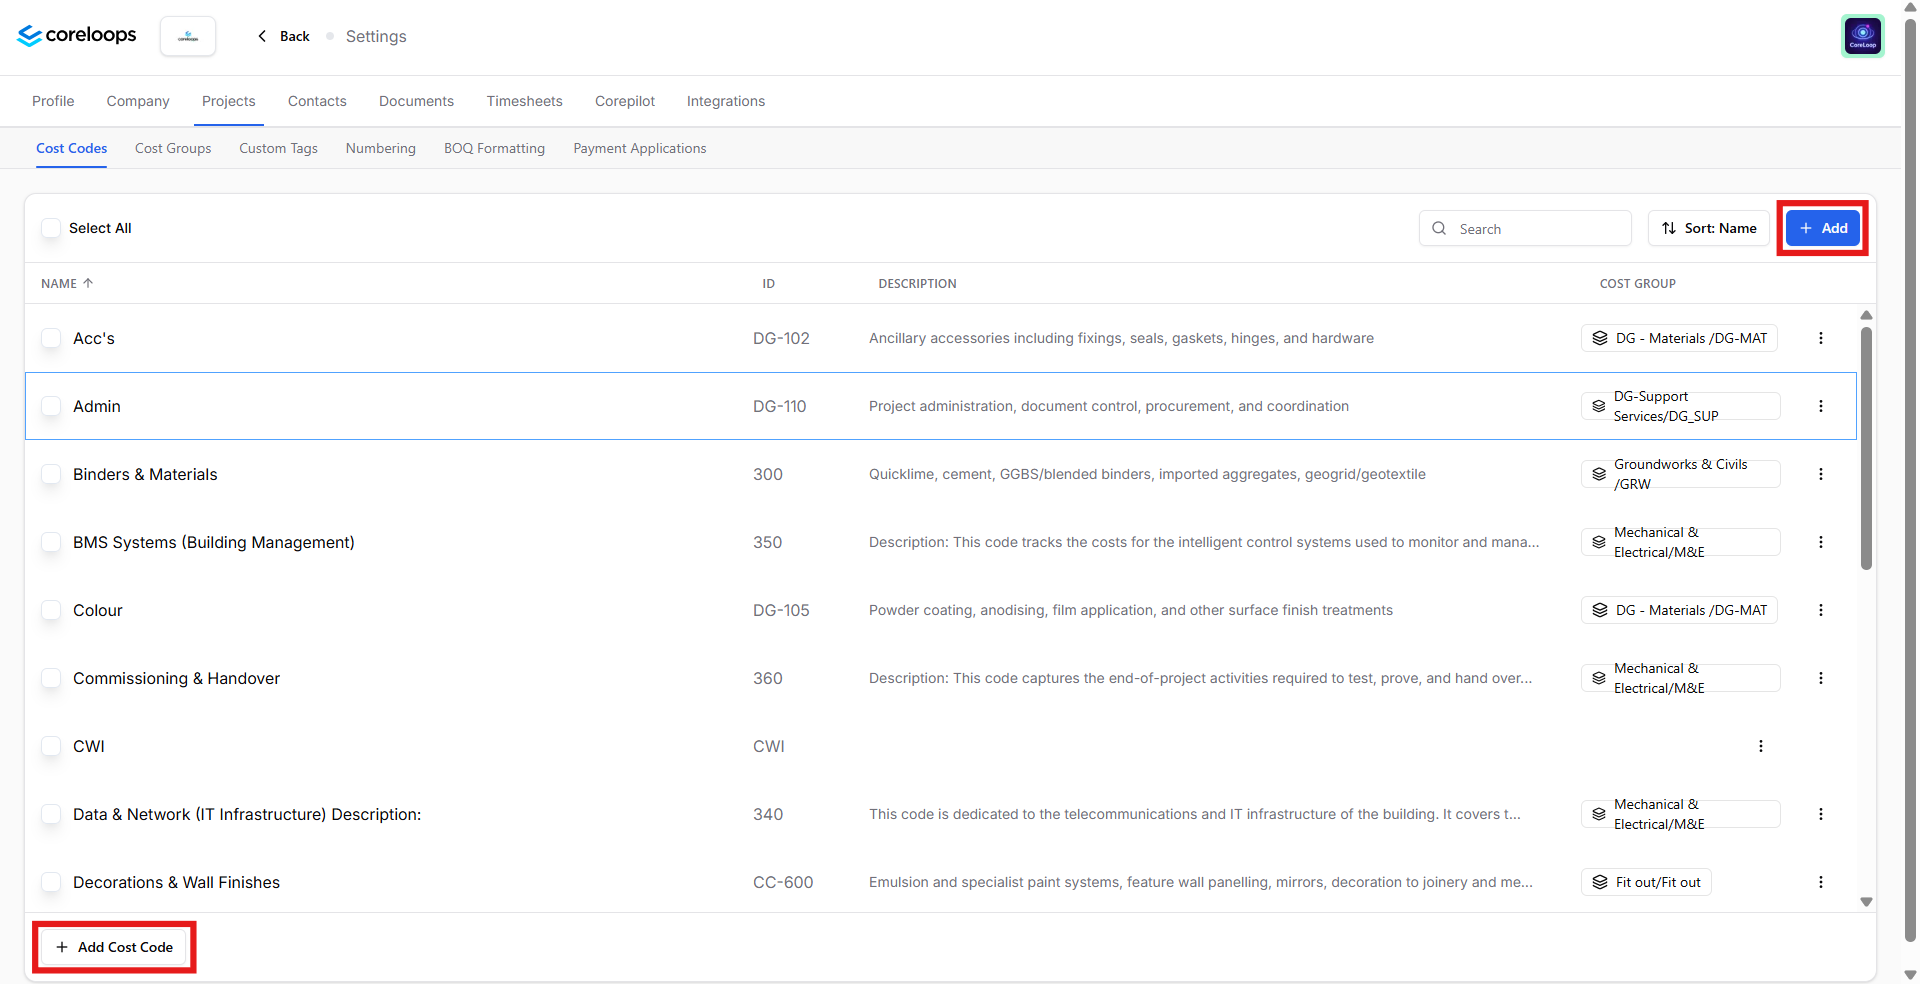
Go to Cost Codes.
Click Add Cost Code. You can either Create Manually or Upload in Bulk
Create Cost Codes Manually:
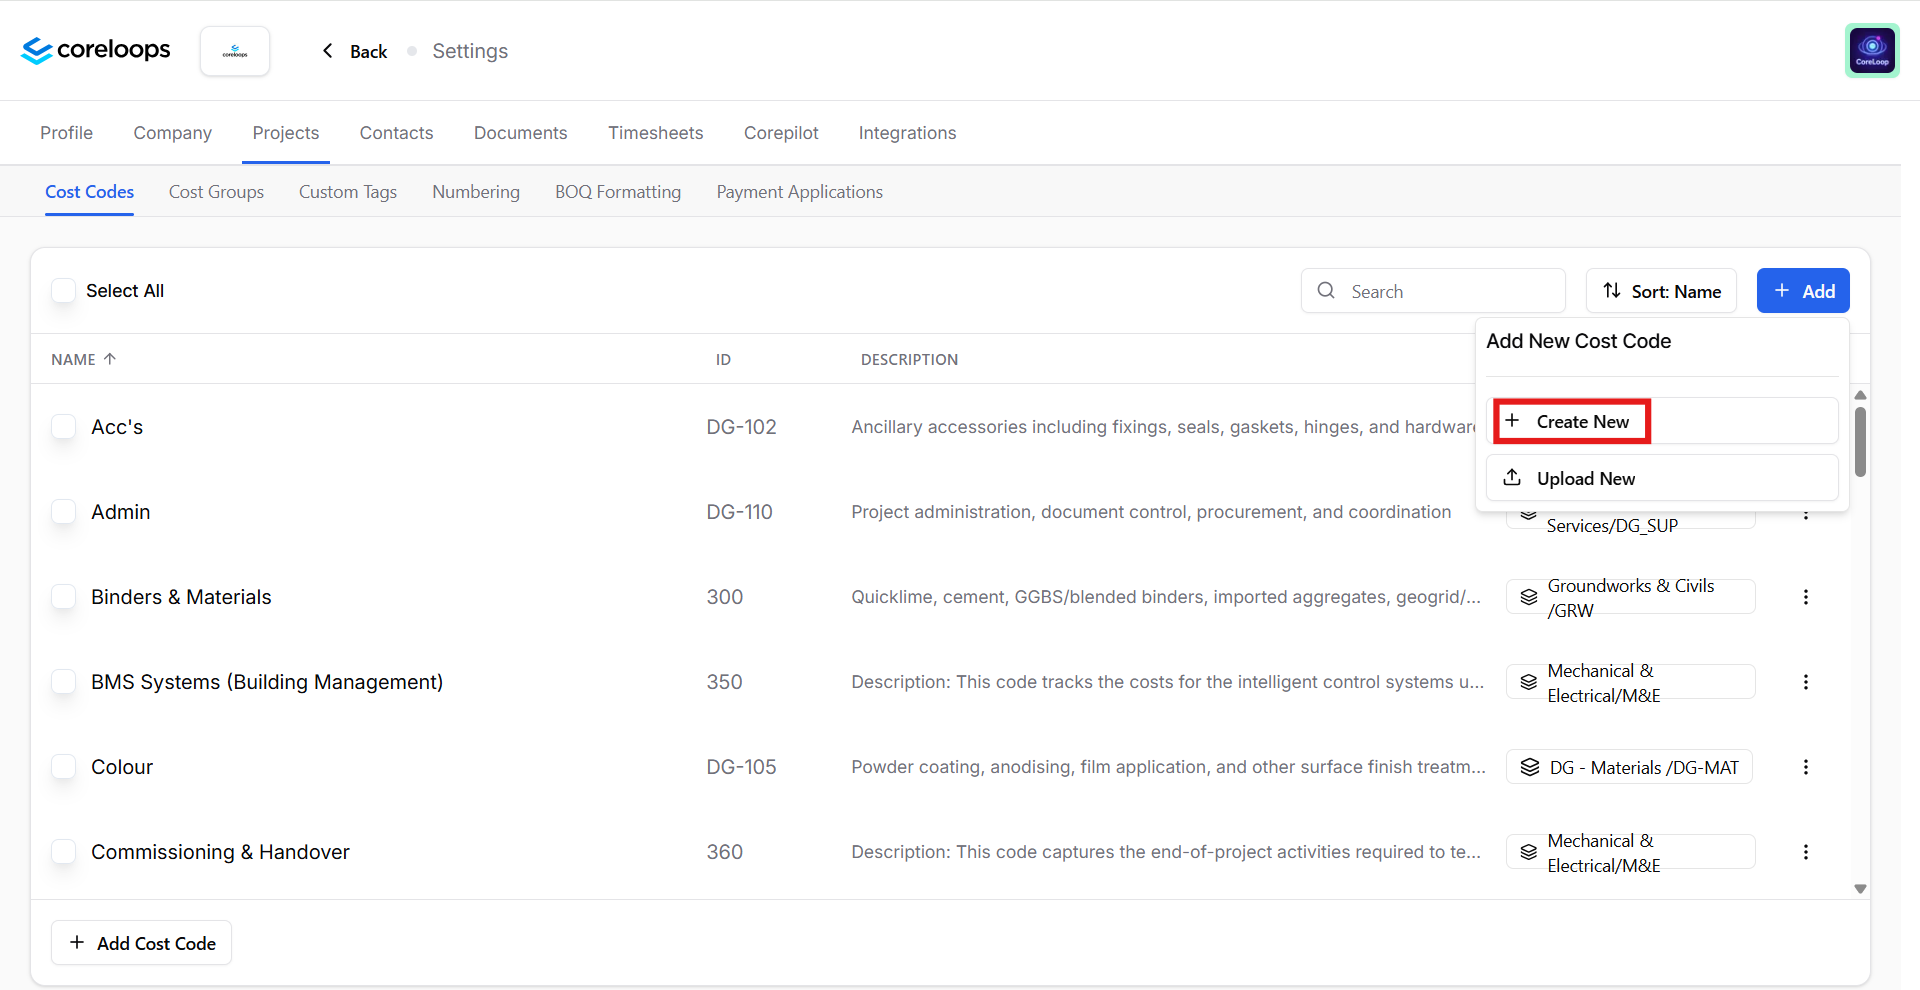
Click Create new (Fill in the required fields):
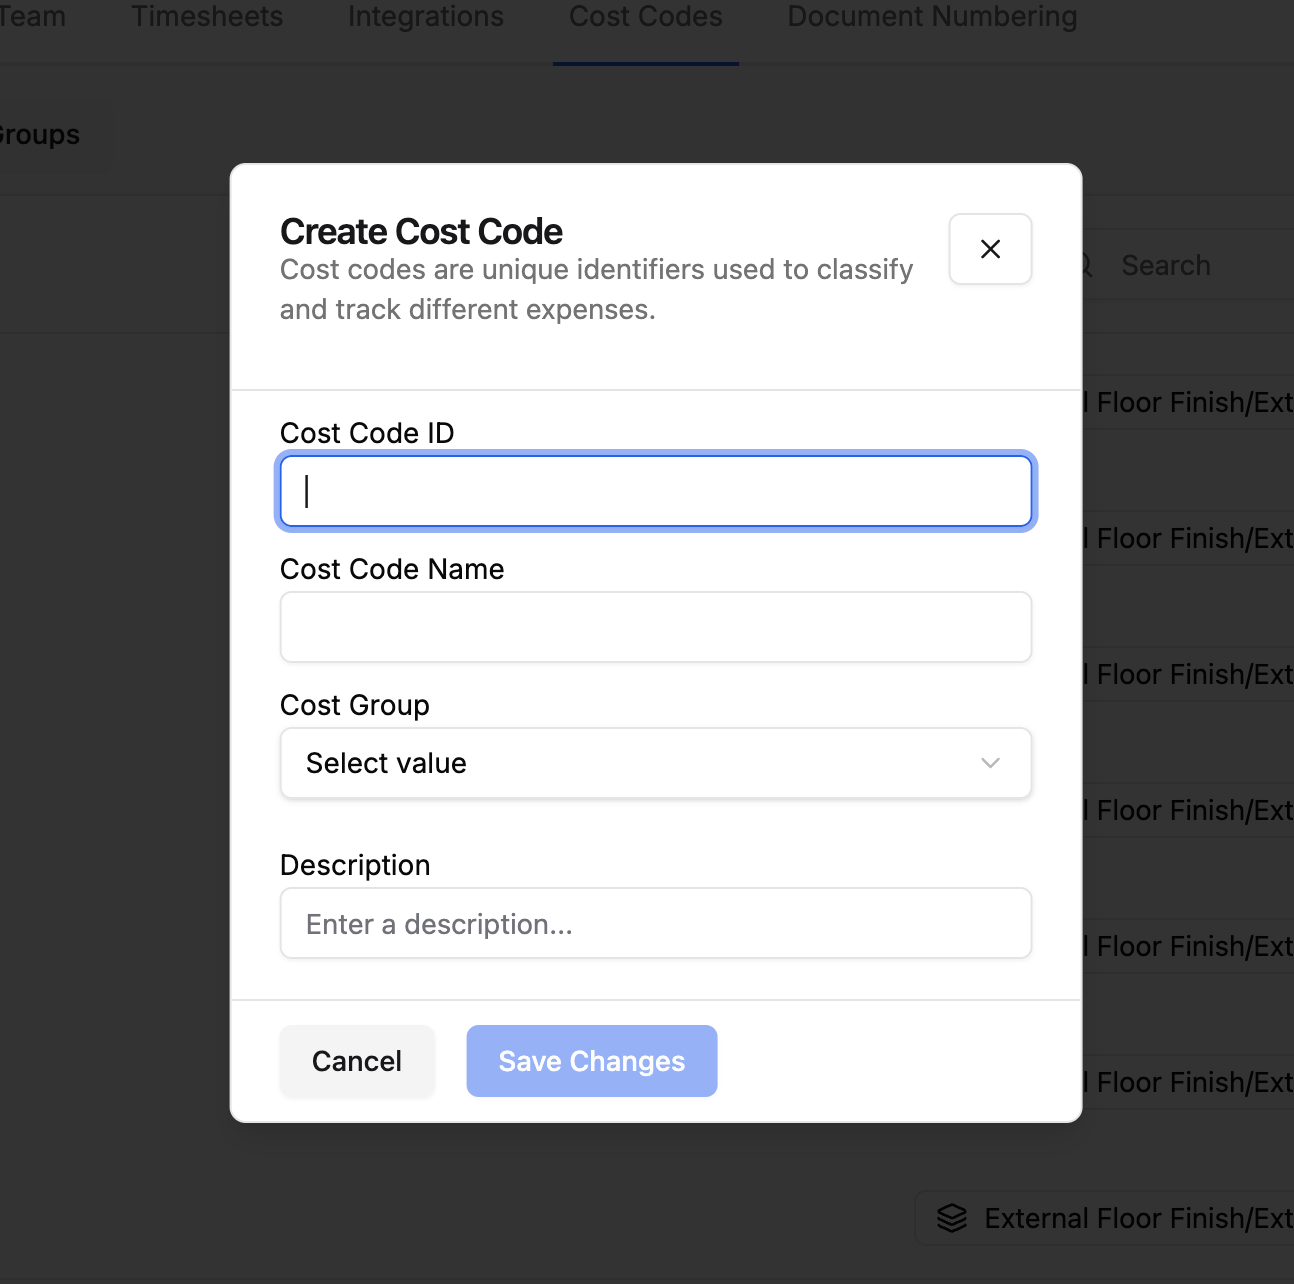
Cost Code ID (e.g., M001)
Cost Code Name (e.g., First Fix)
Cost Group (optional but recommended)
Description (optional) - while optional, adding a description to the cost code can help automatically allocate line items to this cost code when documents are uploaded into the system
Click Save.
Uploading Cost Codes in Bulk - click Upload New:
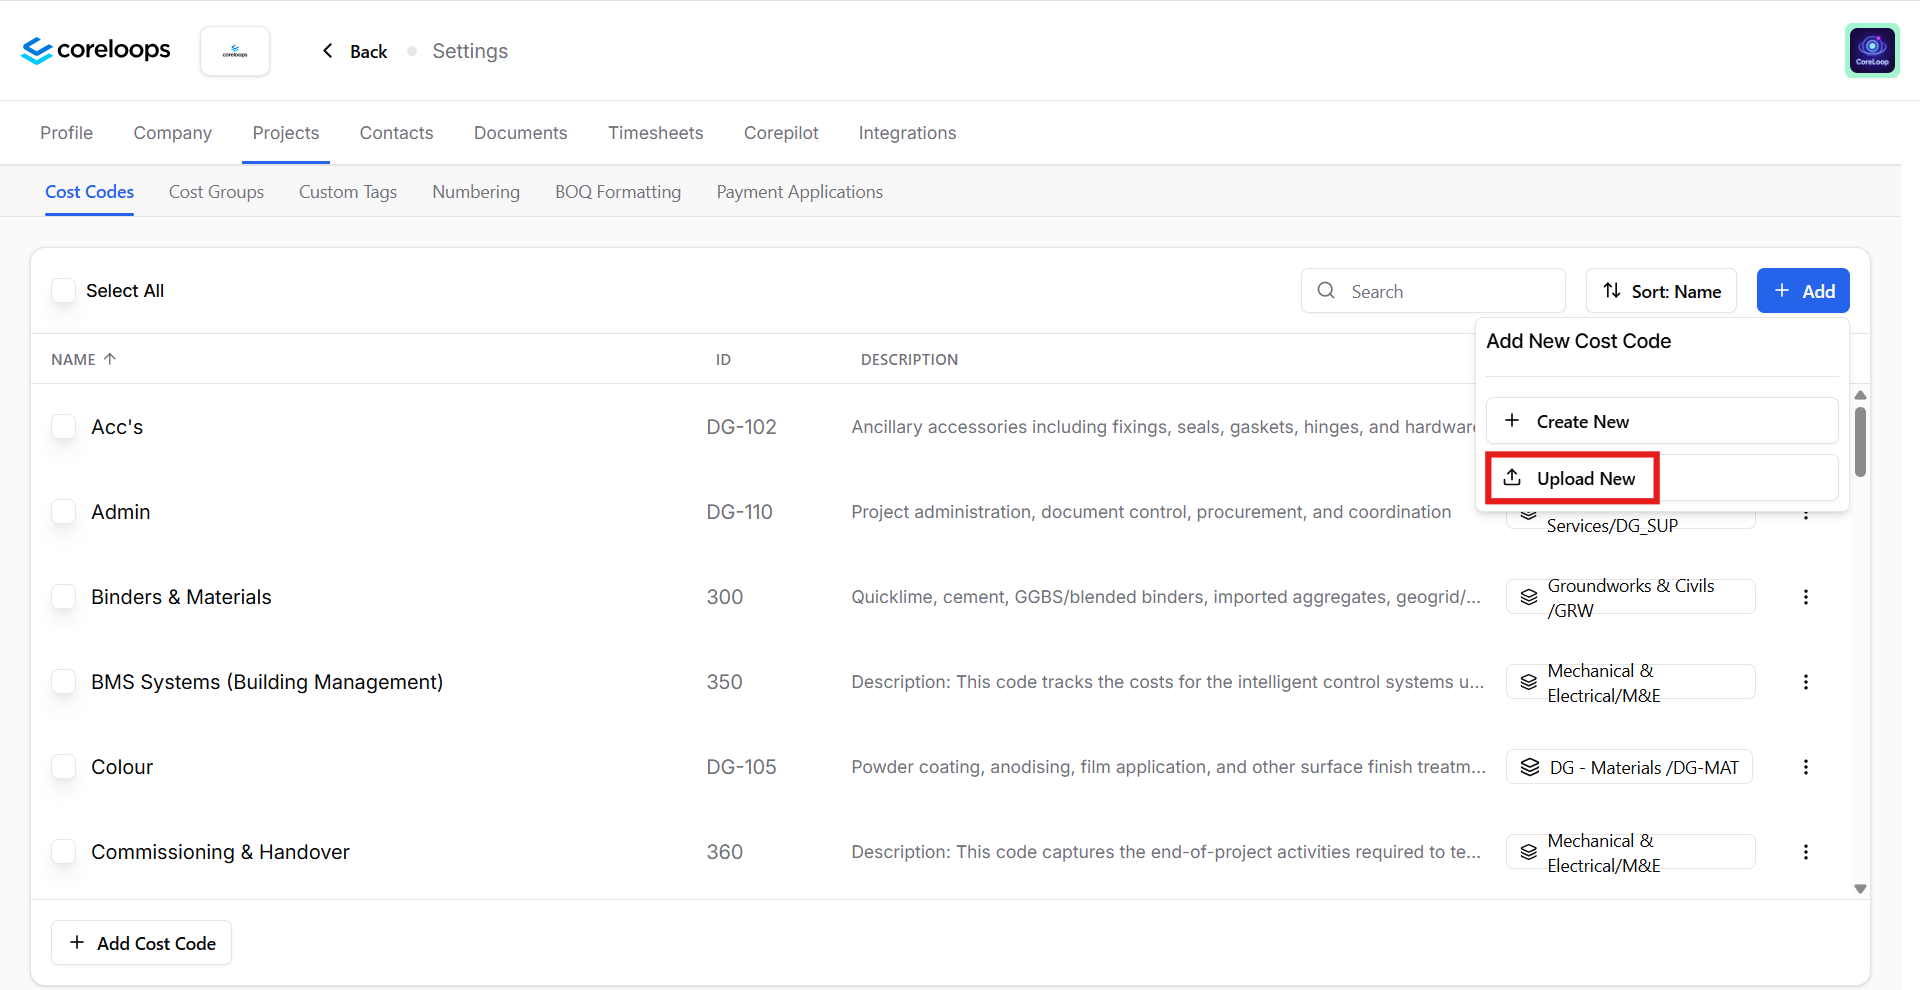
Click Upload New. This will take you to the CSV Uploader
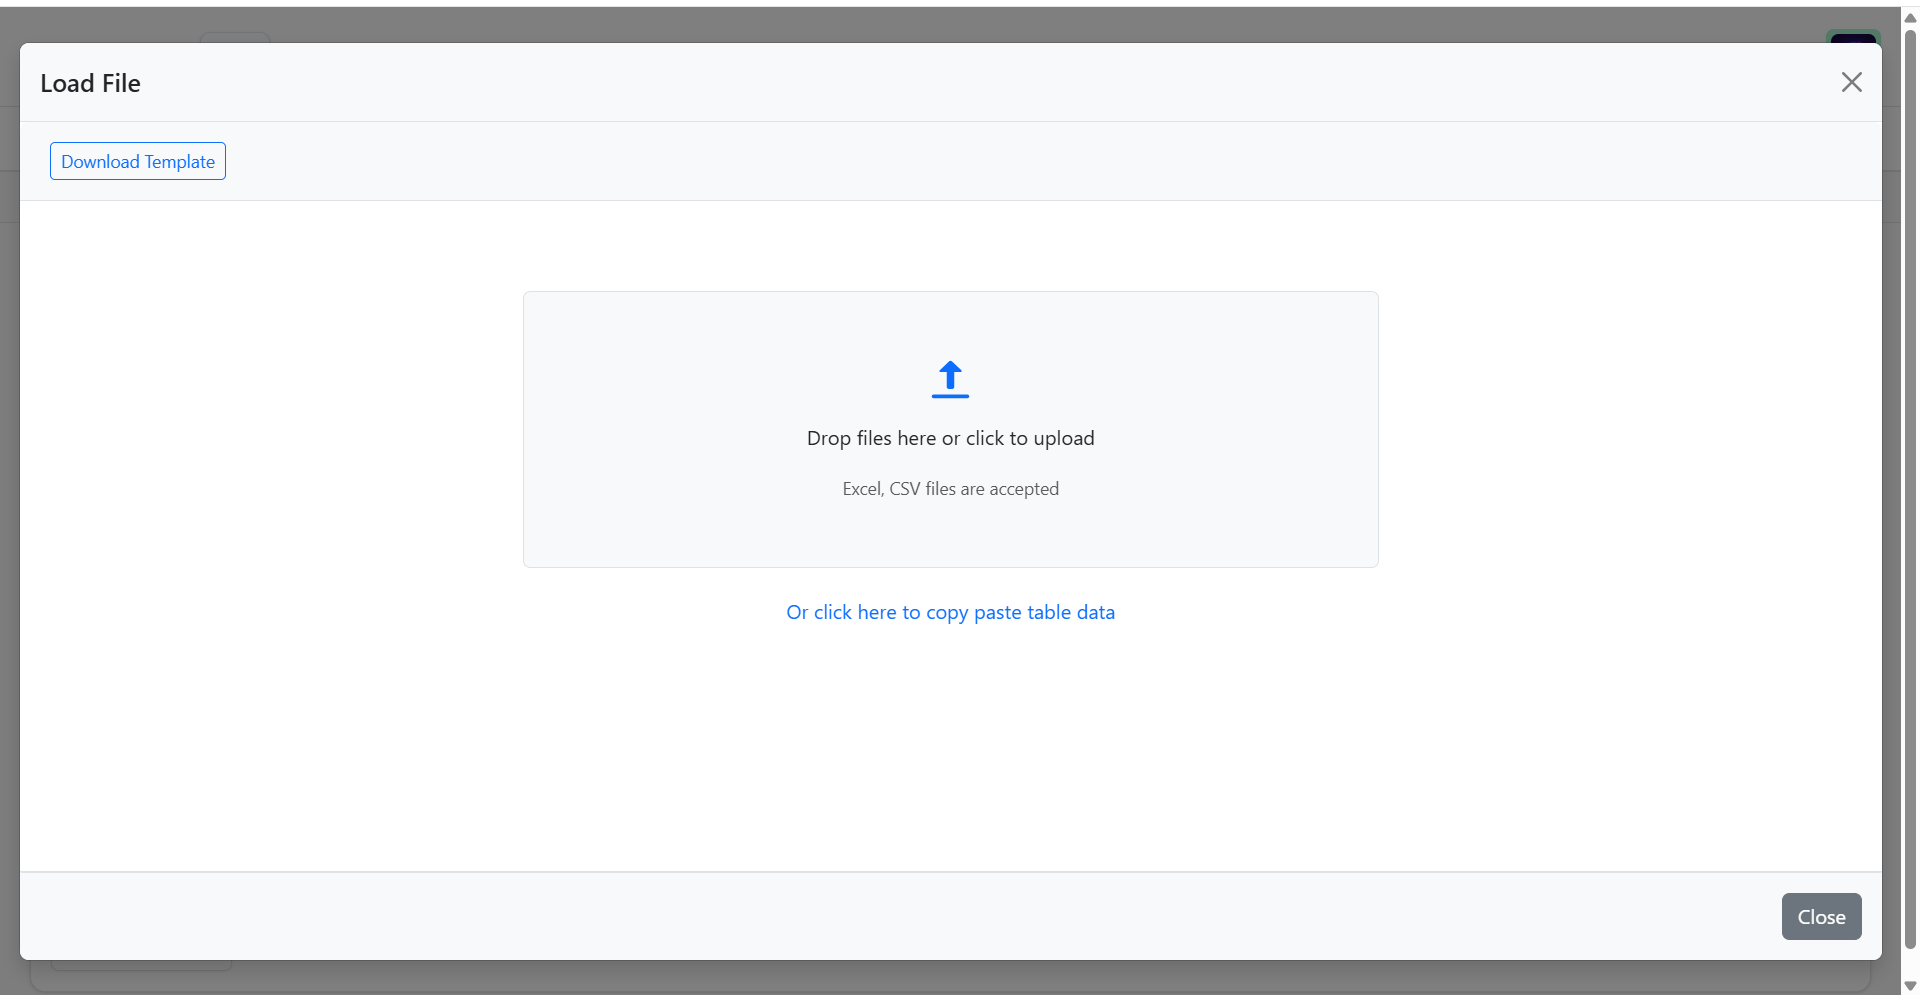
If you don't have a document, download the template and fill it out. If you do already have a document with all your cost codes in it, upload it here
Map the header row and columns
Review the import and then save.
Note: Cost Codes are global and apply across all projects.
To edit a cost code:
Click the three-dot menu next to an existing cost code.
Edit the fields as needed. Changes update across all instances.
To delete a cost code:
You can only delete cost codes that have not been used. Once a cost code has been used, it can only be edited but not removed.
4. Setting Up Cost Groups (Optional)
Cost Groups are optional containers for organising multiple cost codes. For example, you may want a group called "Labour" that contains cost codes like "Masonry", "Electrical", etc.
To create a Cost Group:
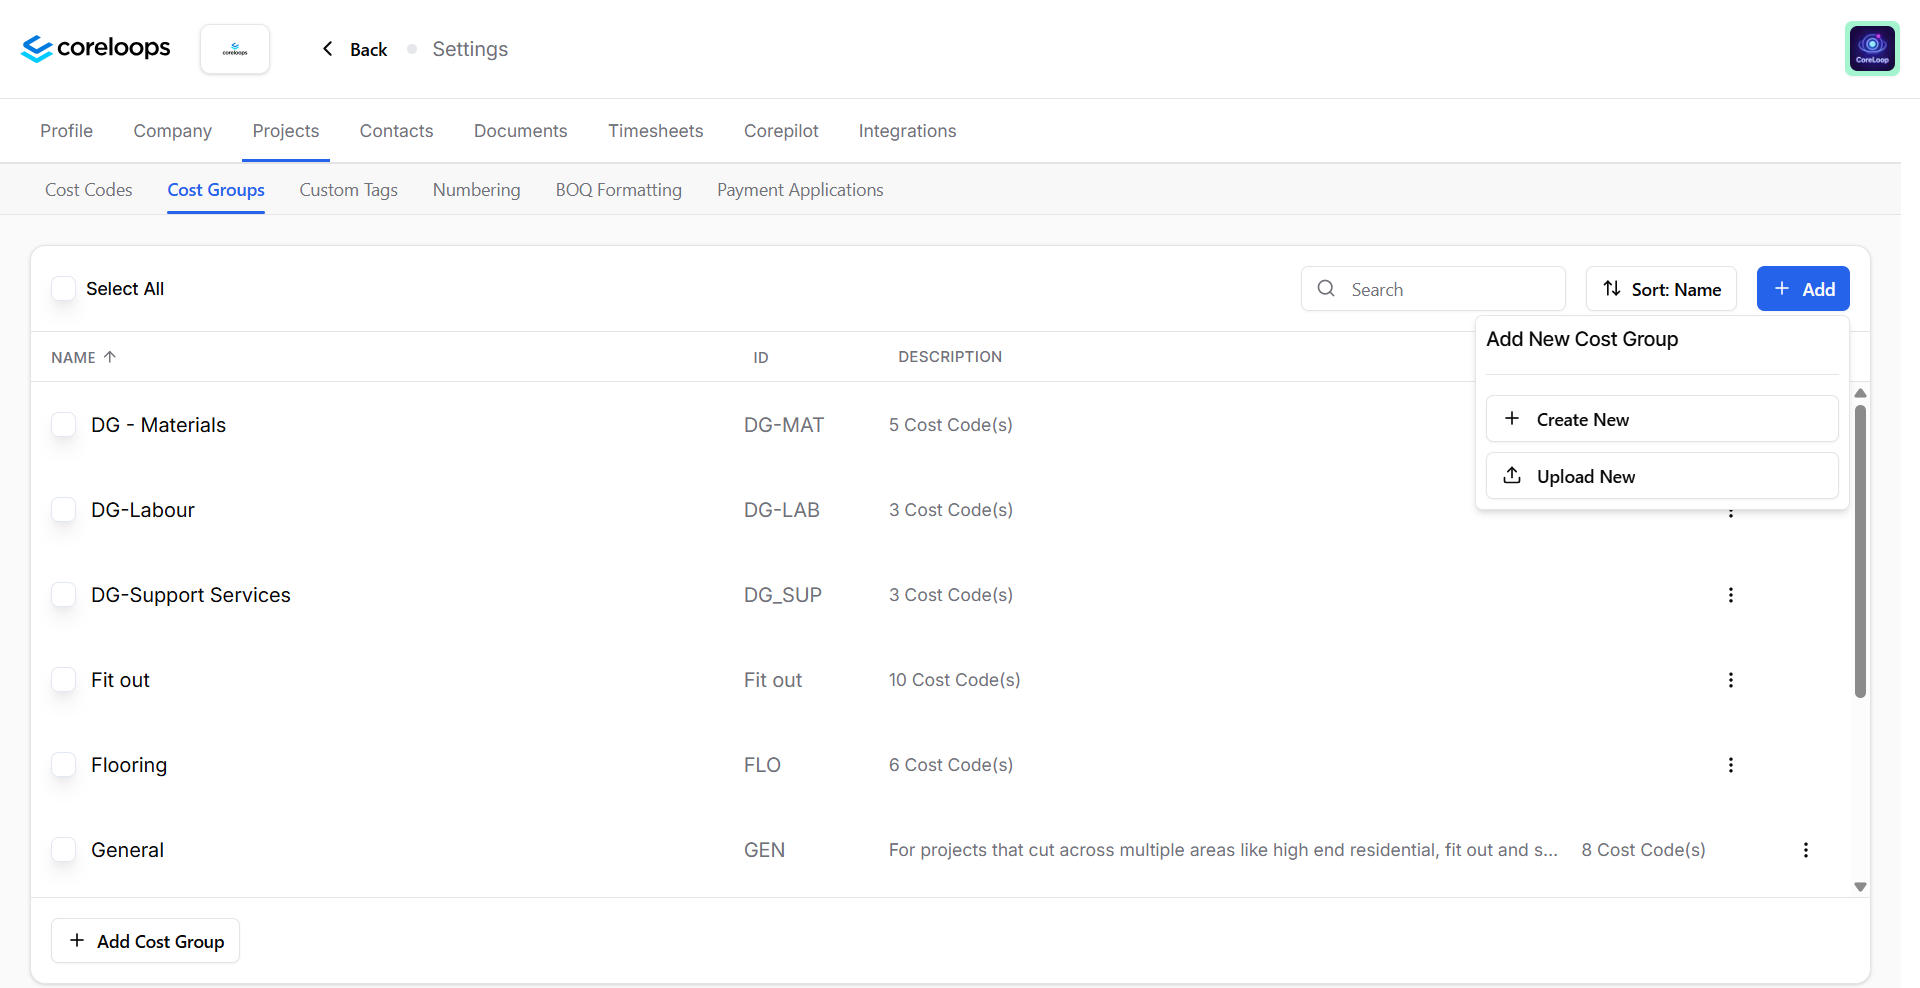
Go to Settings > Projects > Cost Groups.
Click Add Cost Group. Like Cost Codes, you can either create them manually or add them in Bulk
Creating them Manually - Select Create New:
You need to fill in the following:
Group ID (e.g., LAB)
Group Name (e.g., Labour)
Description (optional)
Uploading in Bulk - Select Upload New:
Download Template (if you don’t already have a document with cost groups ready), fill it in with all your cost groups
Upload it to the CSV uploader
Map the header row and columns
Review the upload and import into the system
Cost Groups help structure your cost reporting and analytics. You can create as many as needed.
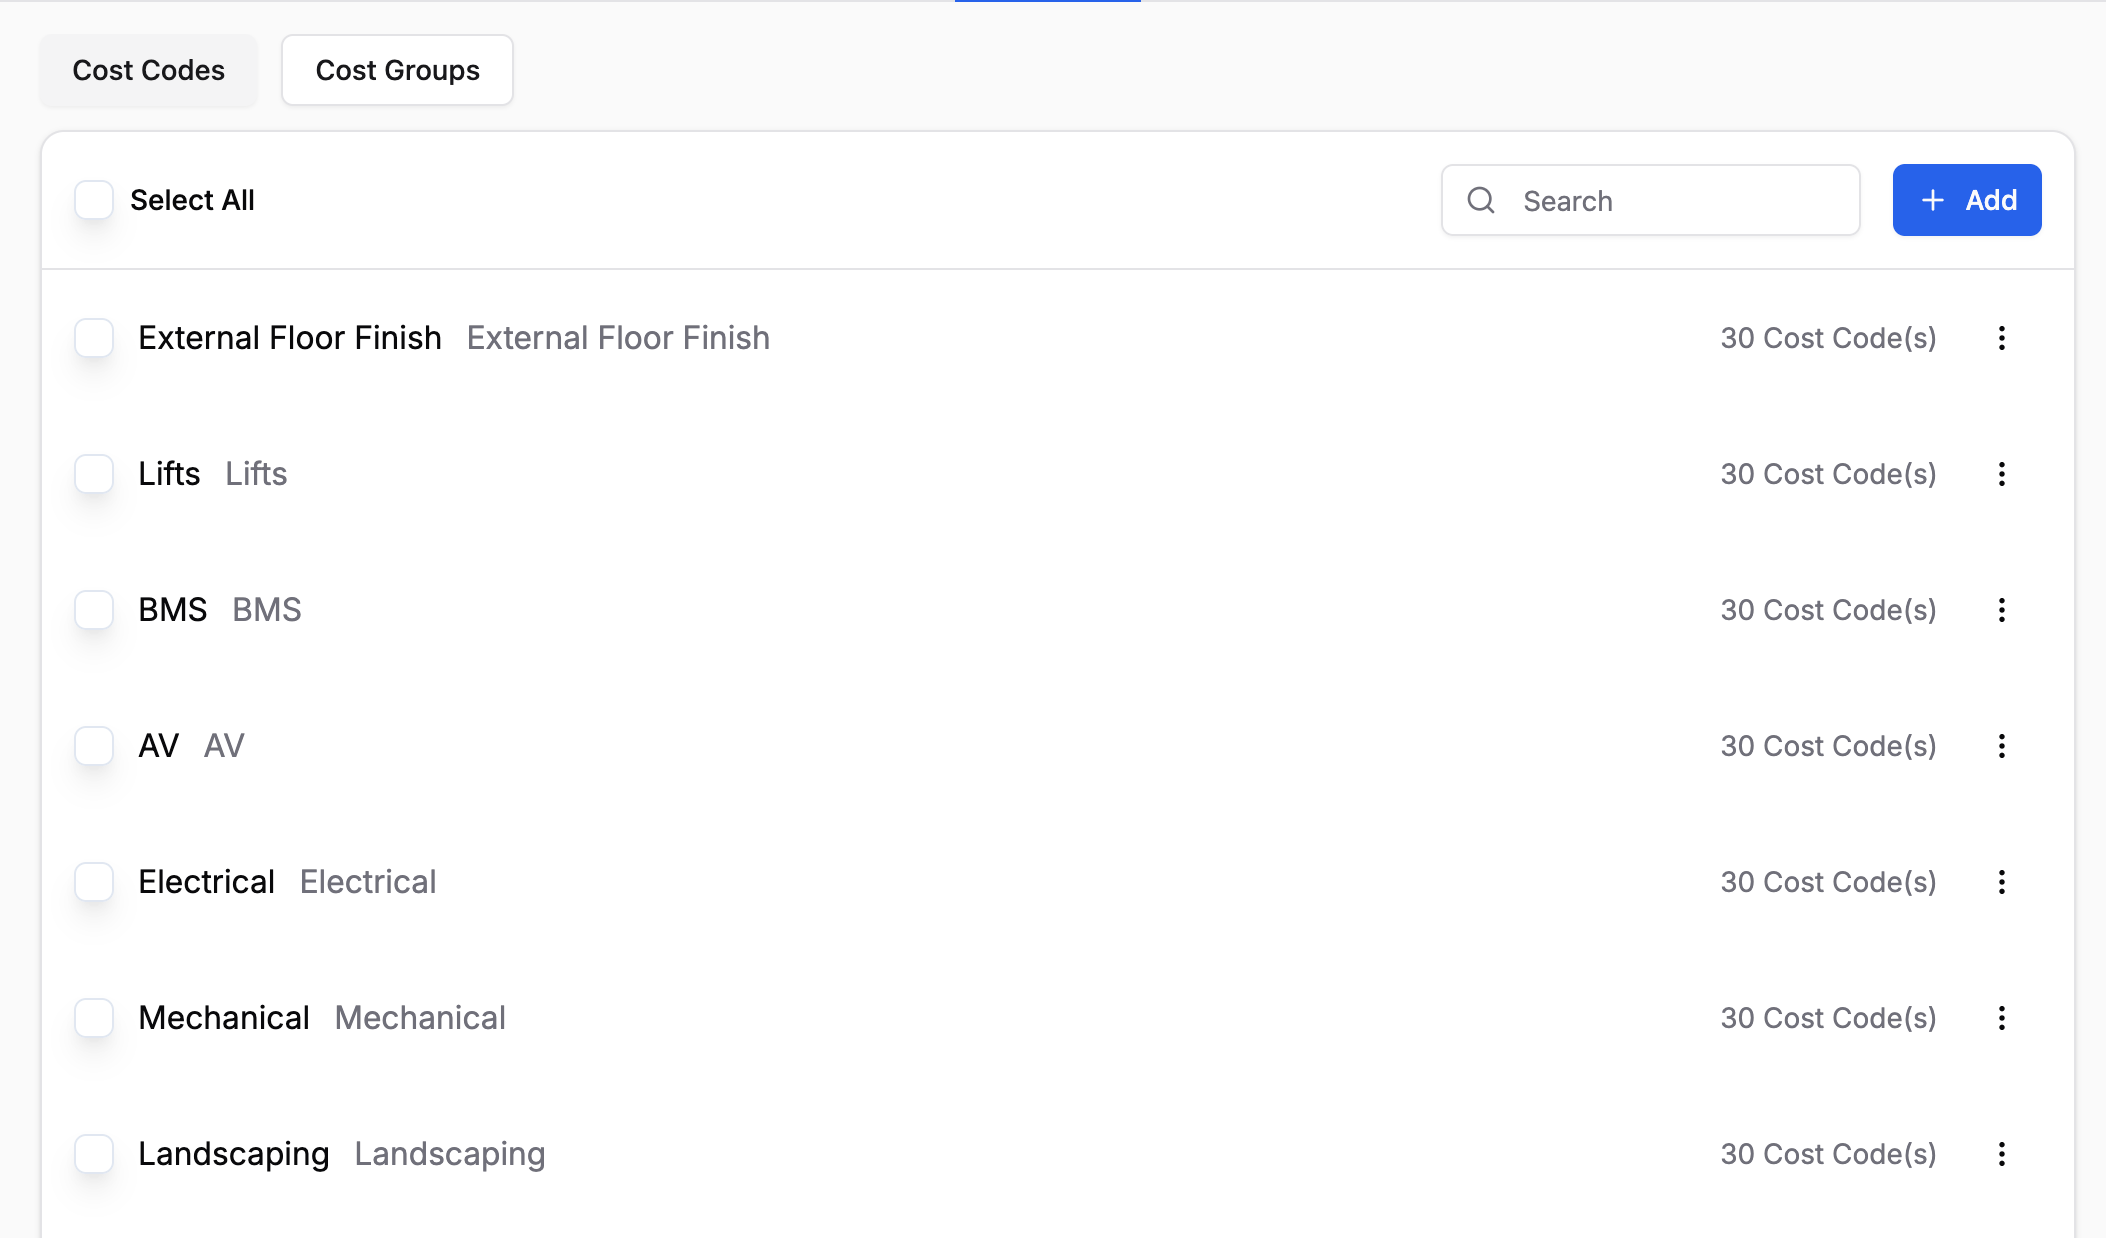
Tip: This is ideal when onboarding or migrating from legacy systems.
5. Automatic Assignment with AI
Documents: When invoices, quotes or receipts are uploaded, Coreloops AI analyses line items and assigns the most appropriate cost code based on the content.
Timesheets: Time entries are similarly tagged based on past behaviour, line items, and job roles.
Users can override any AI-assigned code manually if needed.
6. Linking Cost Codes to your Accounting integration
You are able to connect Cost Codes to Nominal codes in setup in your accounting software; this means that when documents go from Coreloops into your accounting software it will be mapped under that nominal code.
There are two ways to do this:
In Settings, under Integrations, select the settings icon
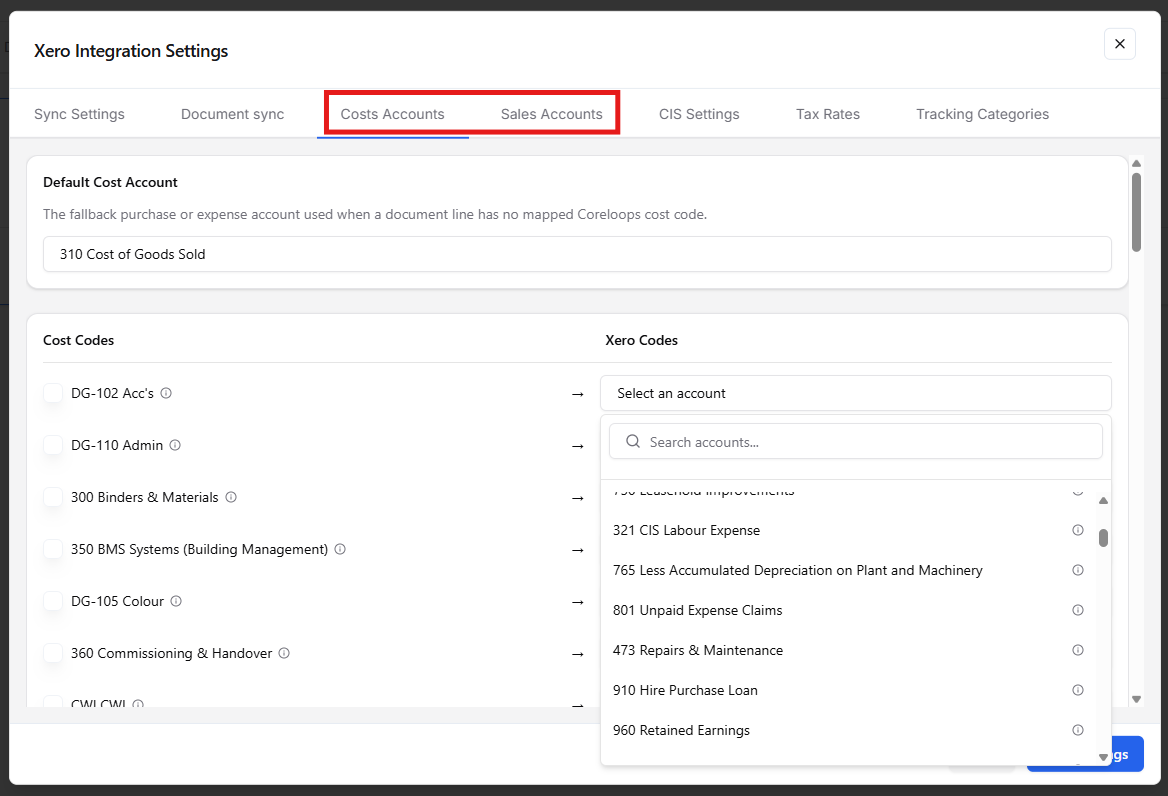
The Cost Account and Sales Account tabs will allow you to map your Coreloops Cost Codes to the nominal codes.
At the top, you can see there is a Default Cost Account - this is the code that all unassigned line items will go to if they do not have a cost code or if their relevant Coreloops cost code is not mapped here.
You have to save settings before closing this; otherwise, the mapping will not save
Inside a document, when looking at the full view of the document
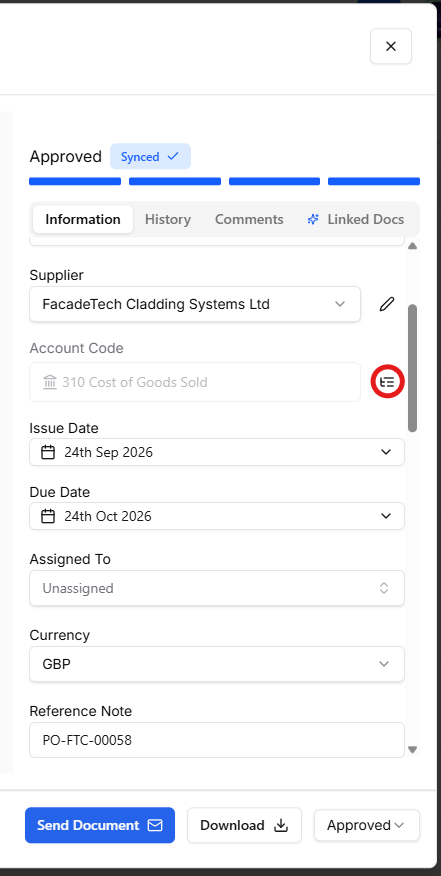
You can see that there is an account code row in the full document view. Here you can see the account code that the document is automatically mapped to the default code. By pressing the button in red.
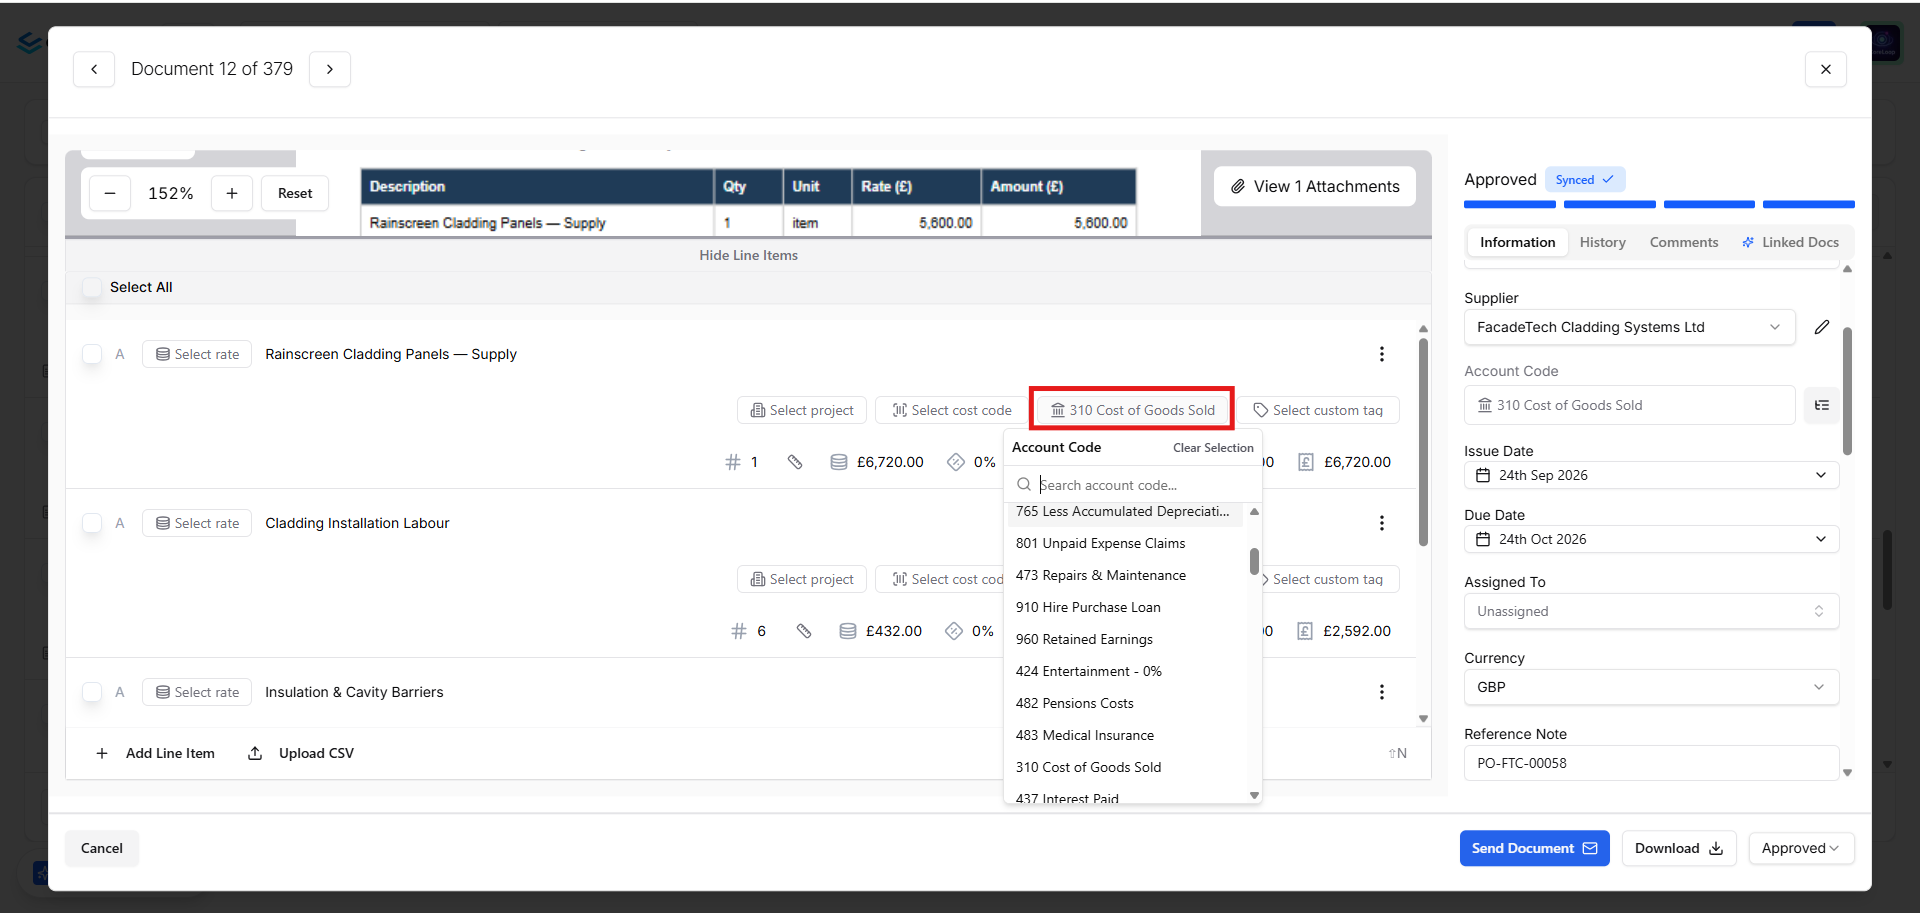
This will add the account code tab in the line item view. Meaning that you can map line items to account codes.
7 Custom Tags
Custom Tags are another way to track and report costs, income, and margins across your projects. You are able to map line items in documents to both a cost code and a custom tag.
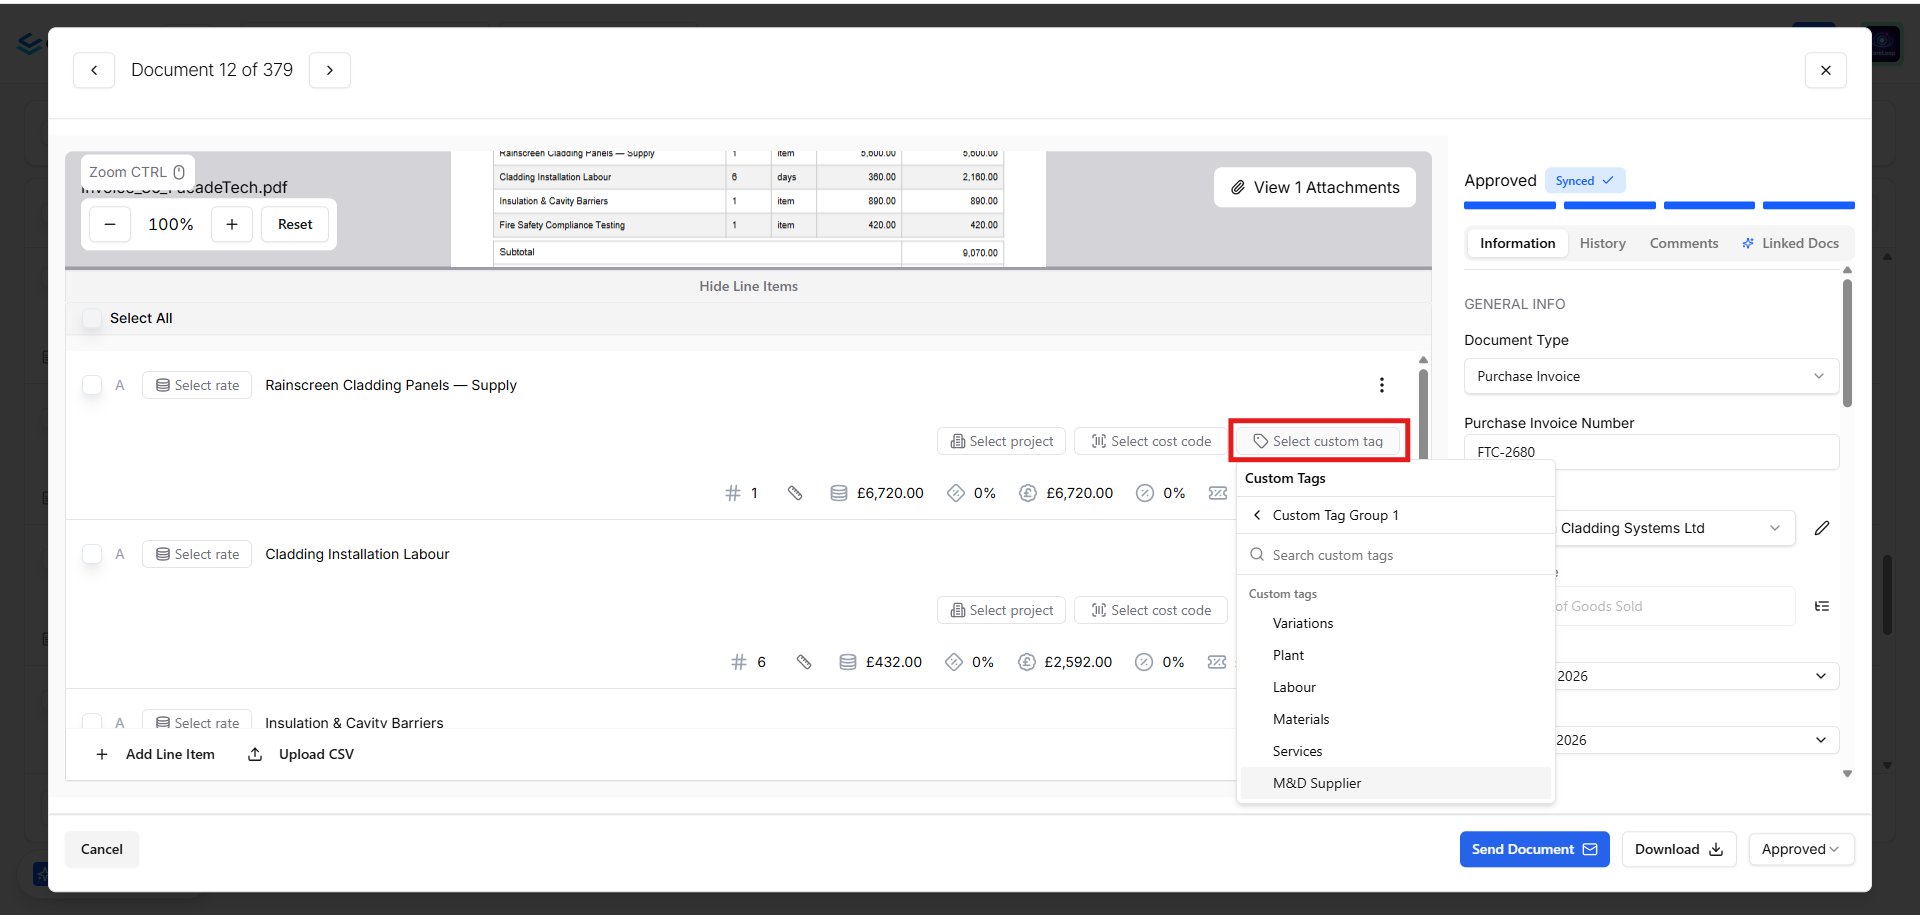
Custom Tags can be imported in via the Bill of Quantities or created manually.
To create manually:
Go to Settings > Projects > Custom Tags
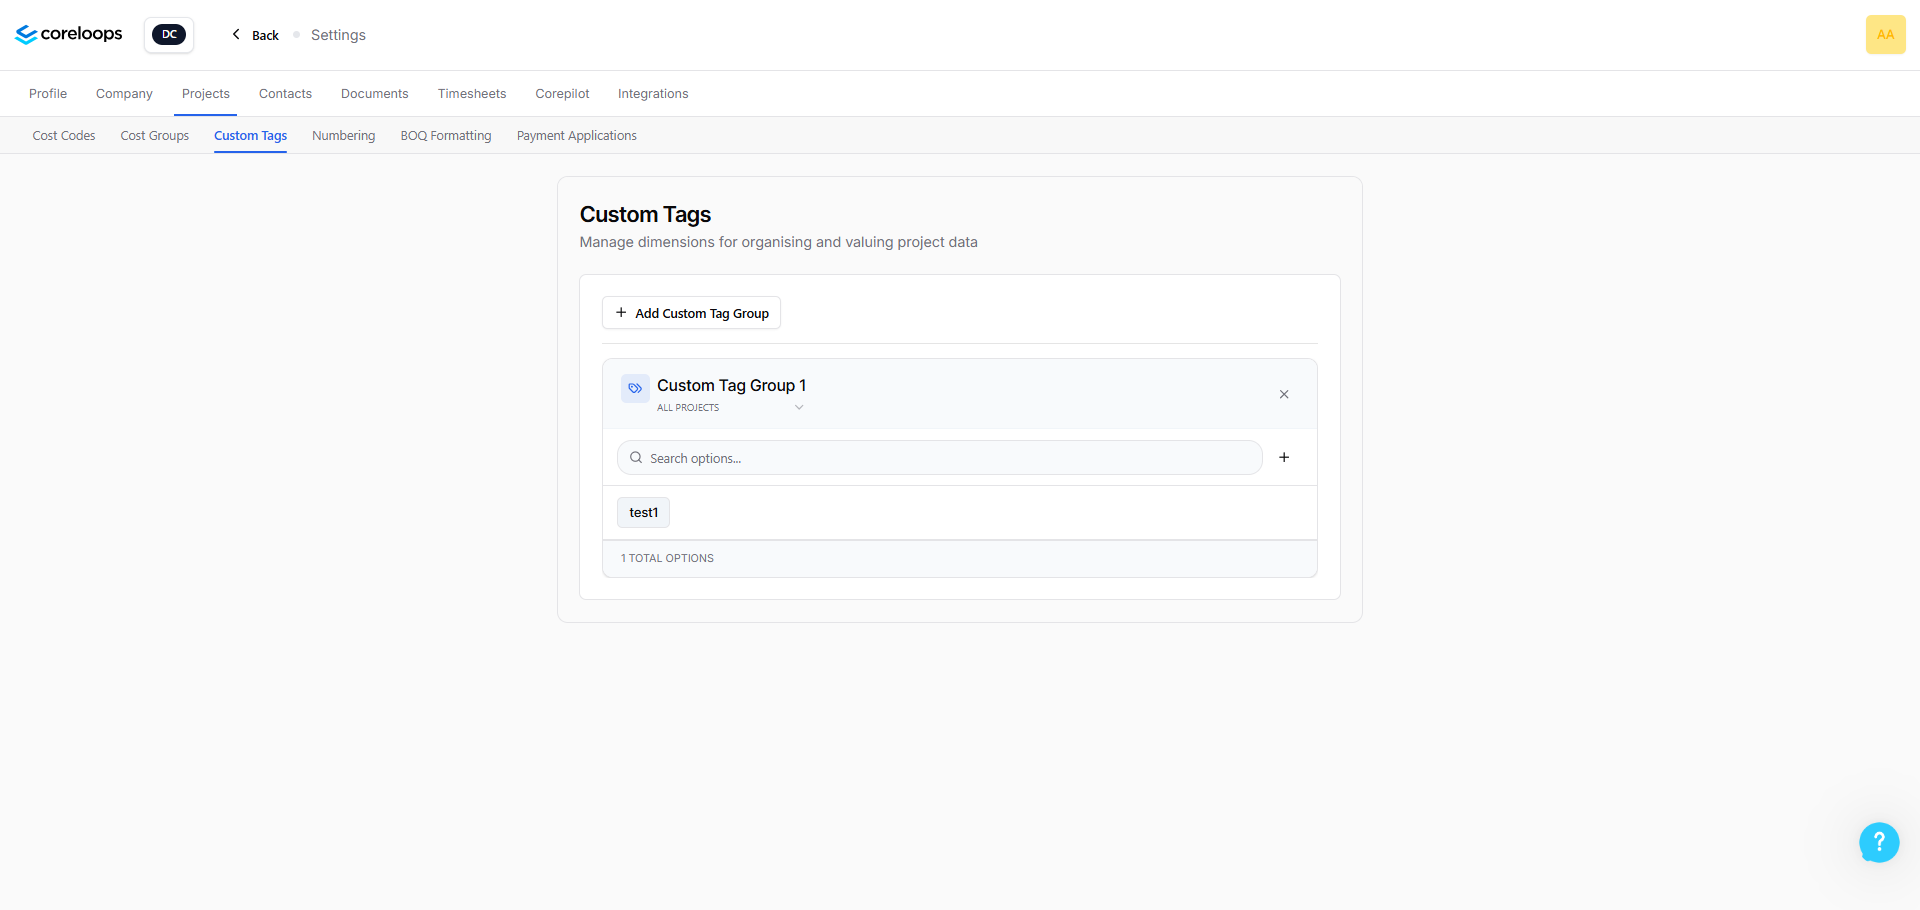
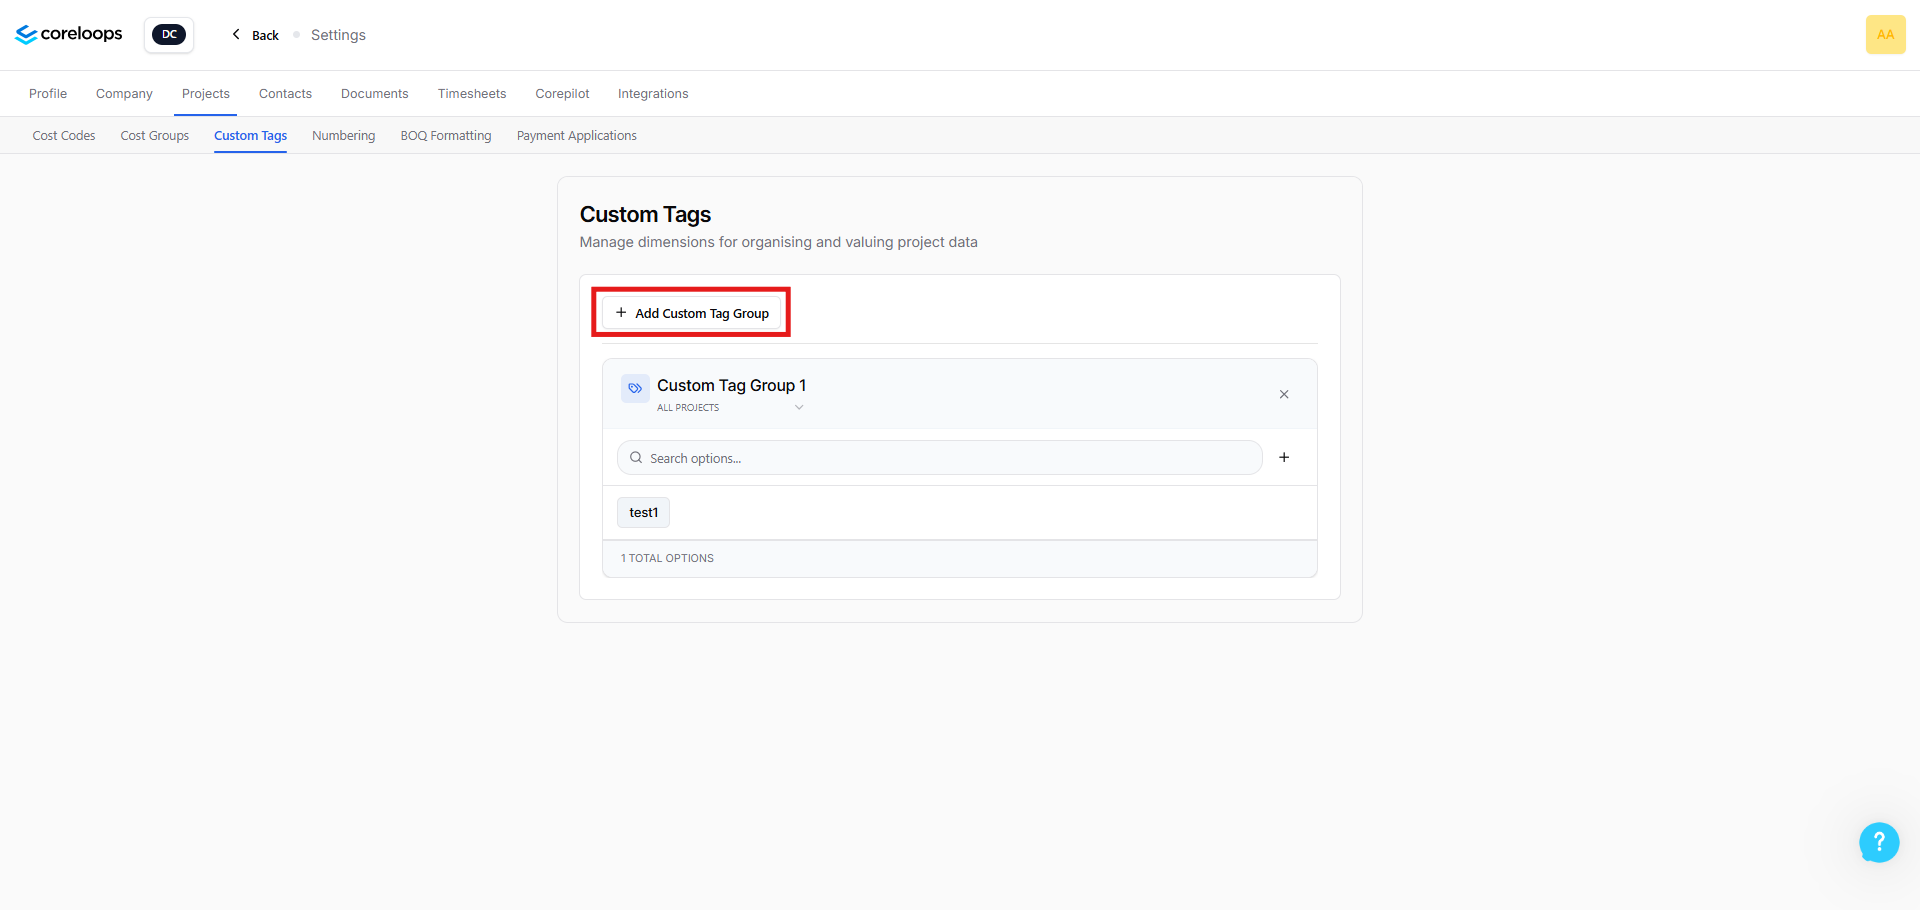
You can create new custom tag groups if they do not already exist by using the Add Custom Tag Group
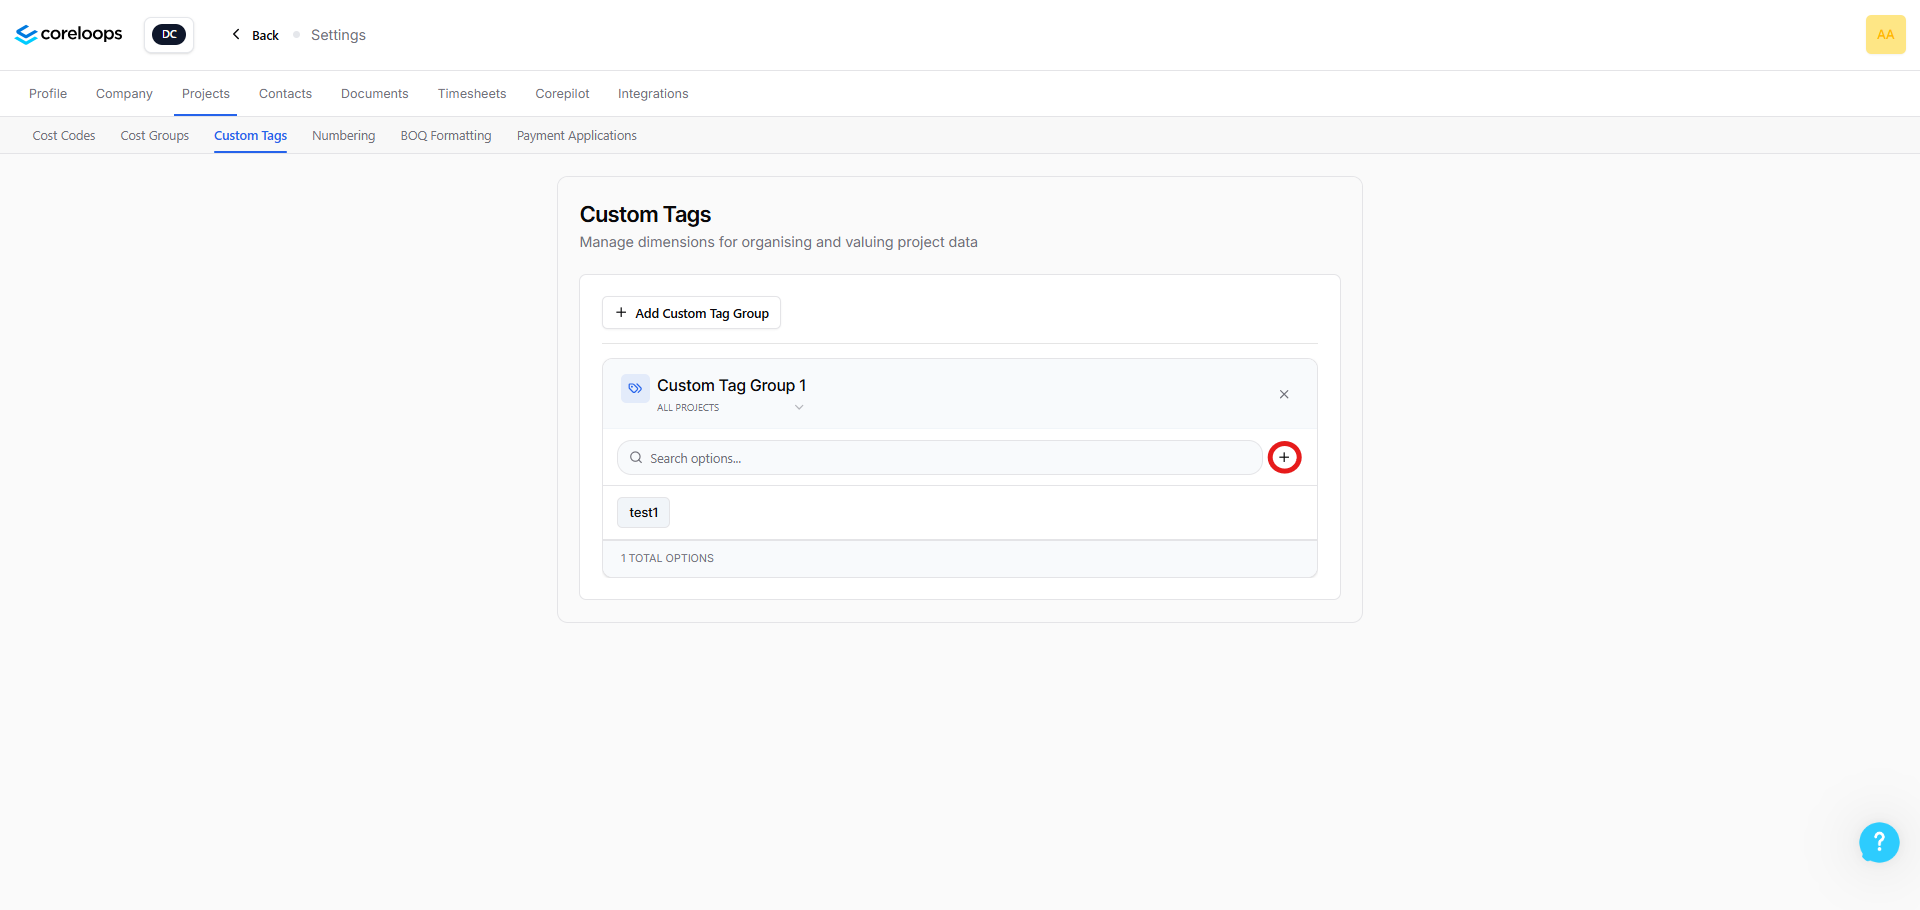
If there are Tag Groups already, then the plus button allows you to create new Tags
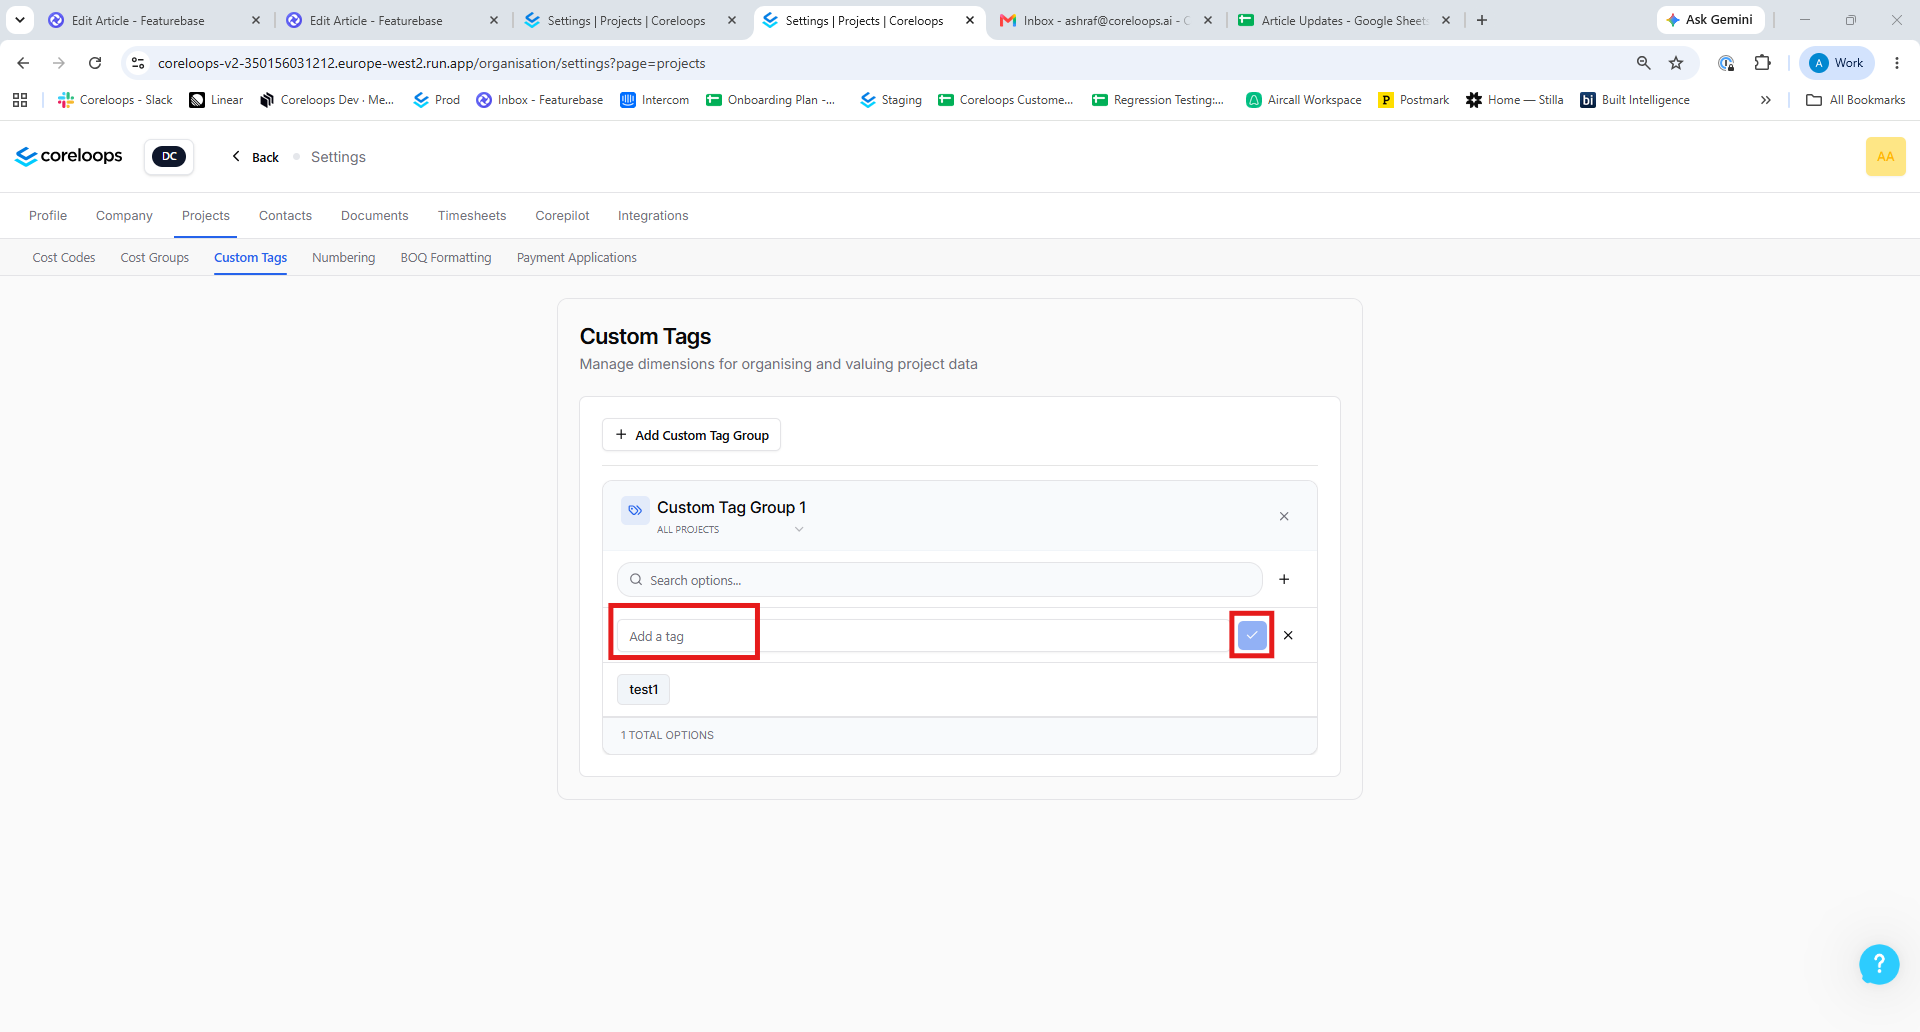
After pressing the plus button, add the name of the tag you want to create and press the blue plus button to create it
Import from BOQ.
When importing a BOQ using the template, there will be a column for custom tags. If you fill in this column, custom tags will be created via this import.
8. How these feed into reports
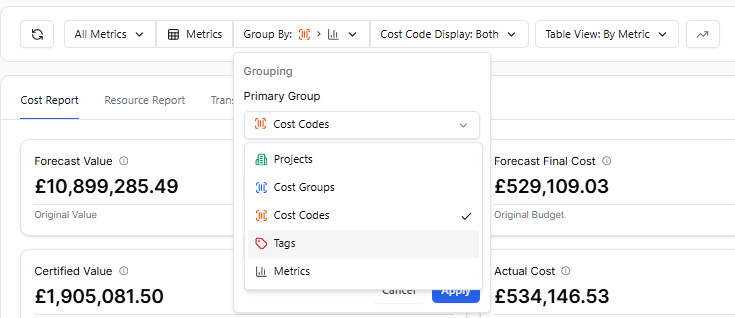
When looking at your dashboard in Coreloops, you can view costs broken up by Cost codes and Custom Tags
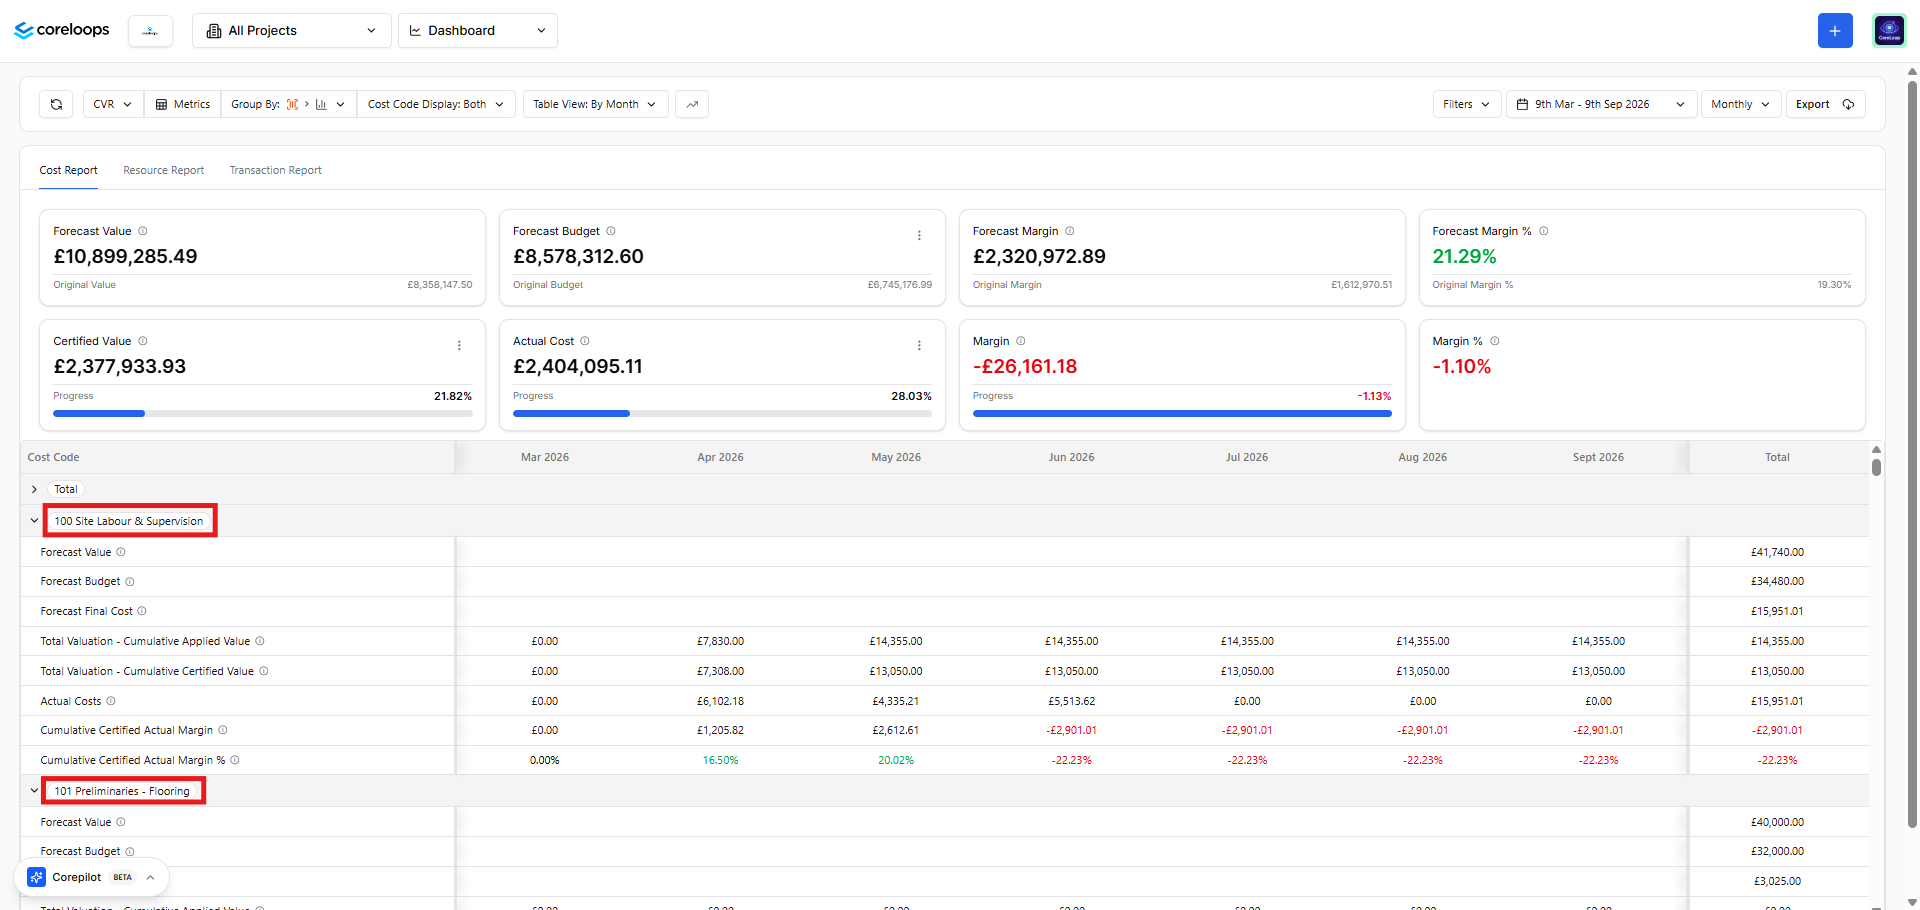
You can change which of the groupings you see in the dashboard by using the filters at the top.
Was this helpful?
Still need help? Ask the team